ORGANIZATION
When working on a transmission, organization is critical. You must note the orientation of every bearing, every seal, every spacer, and every thrust washer. Taking time to carefully organize your parts as they are removed will make all the difference in the world. Taking photos step-by-step will also assist.
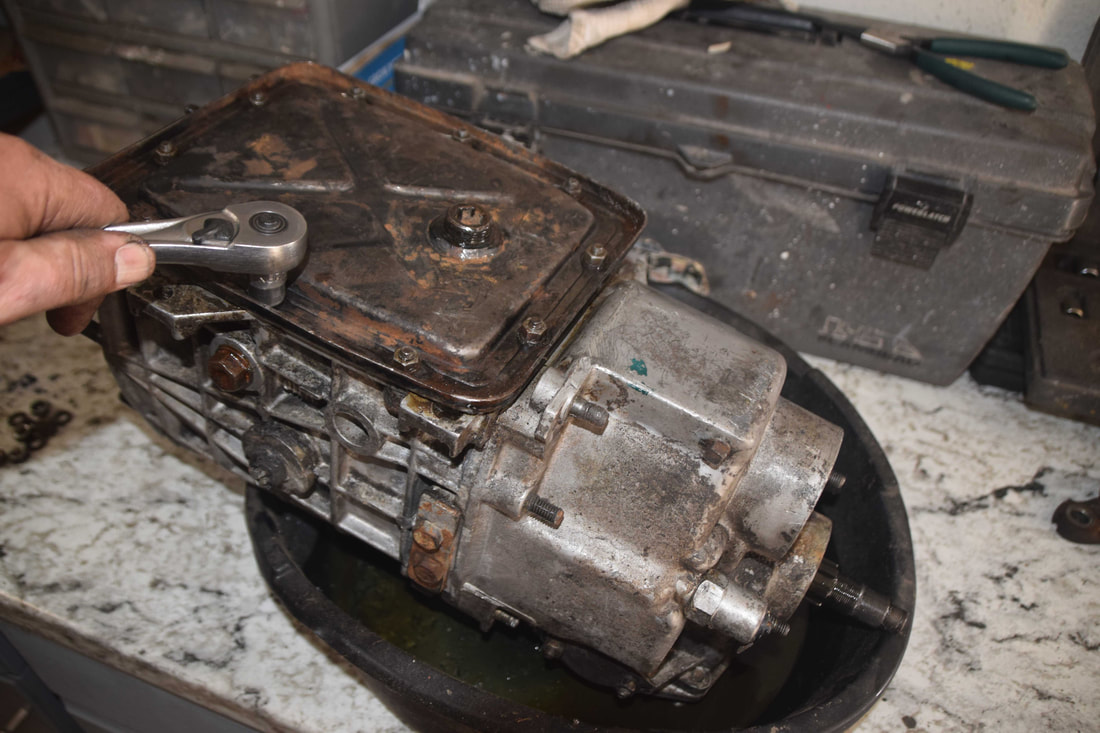
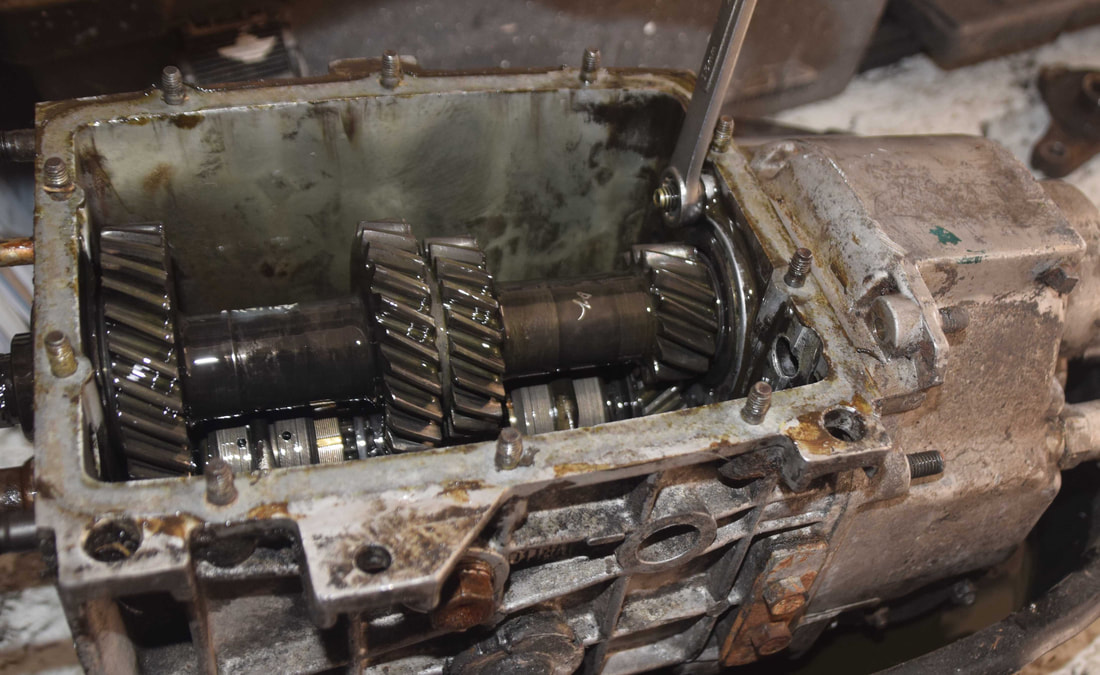
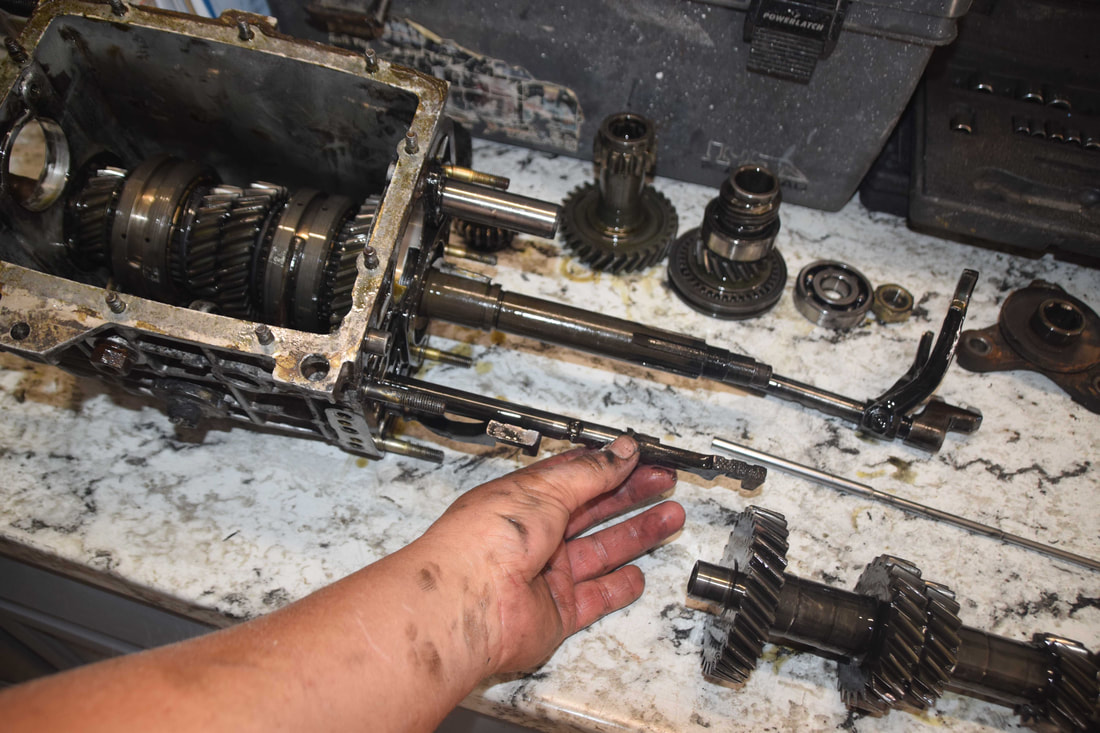
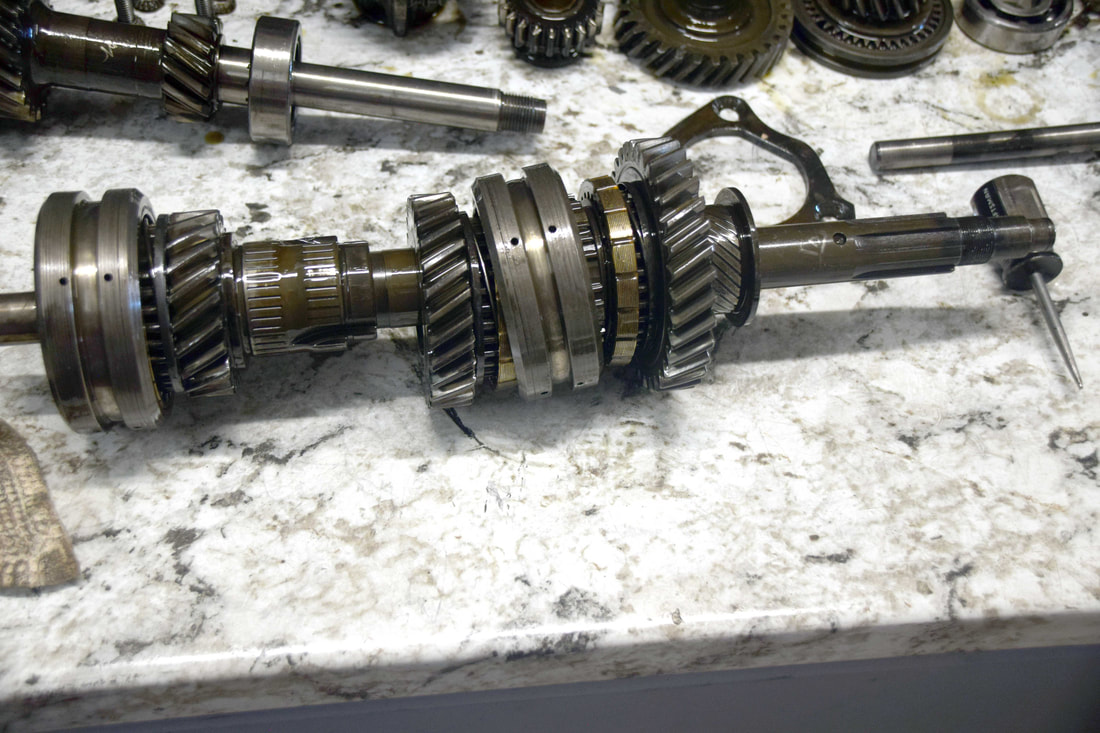
FULLY DISASSEMBLED
This will give you an idea of what a disassembled transmission looks like. In the photo, there are still two gear clusters still not broken down, but this gives an idea of what needs to be tracked so reassembly is easier.

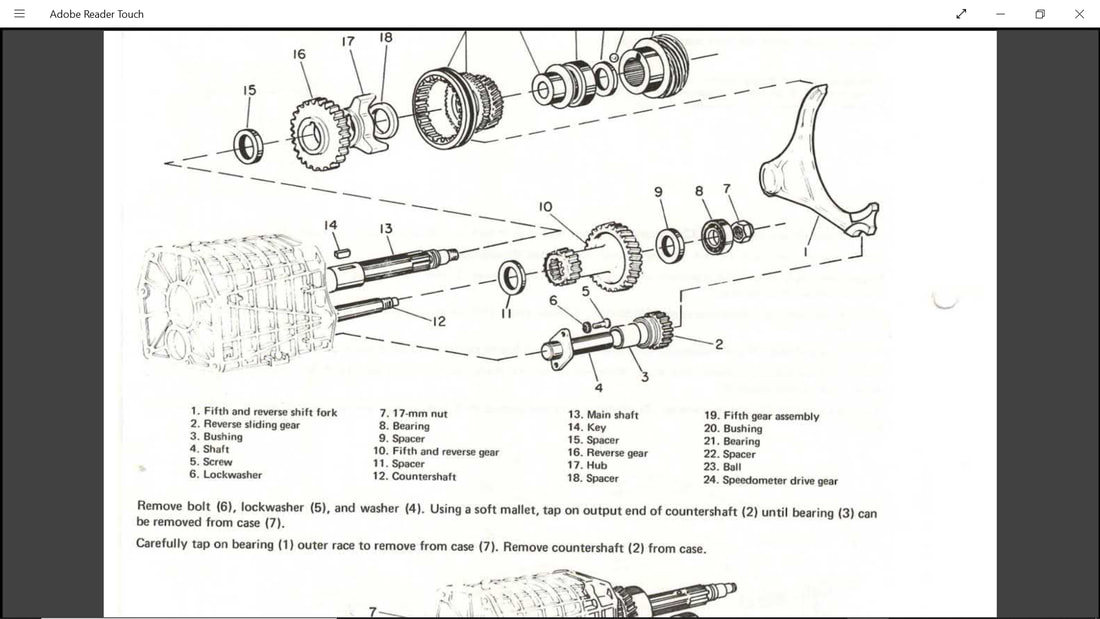
5th gear and reverse assembly
STEP BY STEP DISASSEMBLY
In the photos below, you'll see what was required to break the transmission down for inspection. Some steps are not photographed, but will be referenced.
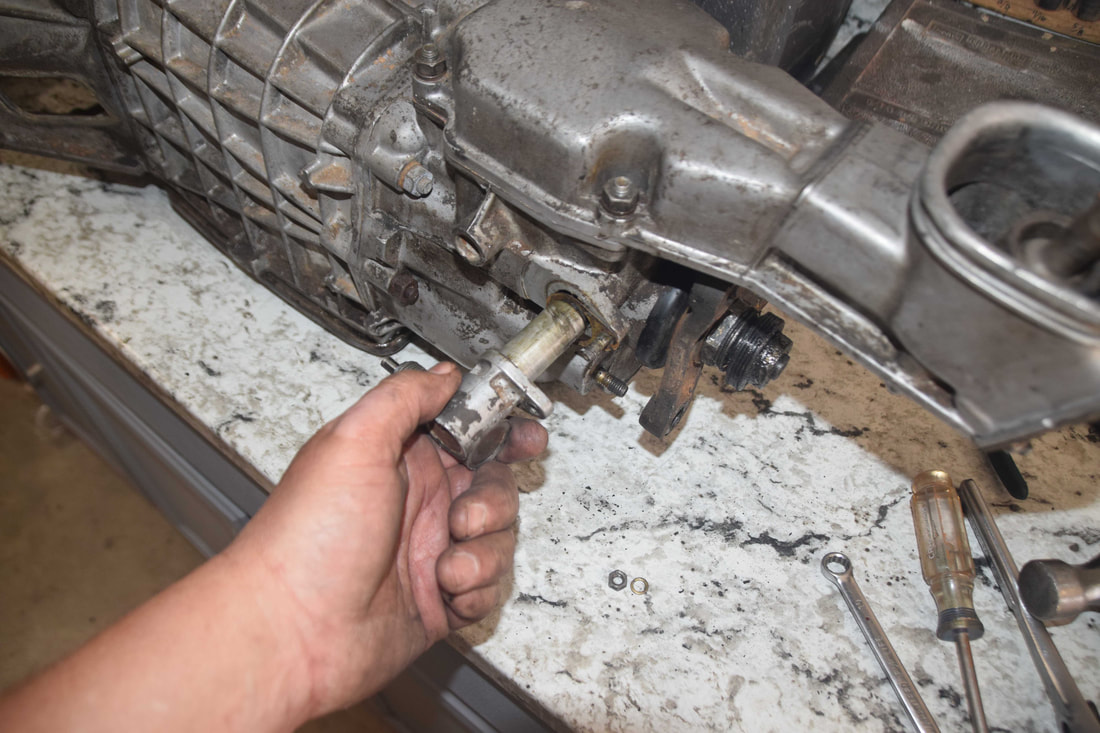
Speedometer drive assembly
Remove the 10mm nut and washer from the speedometer drive gear assembly.
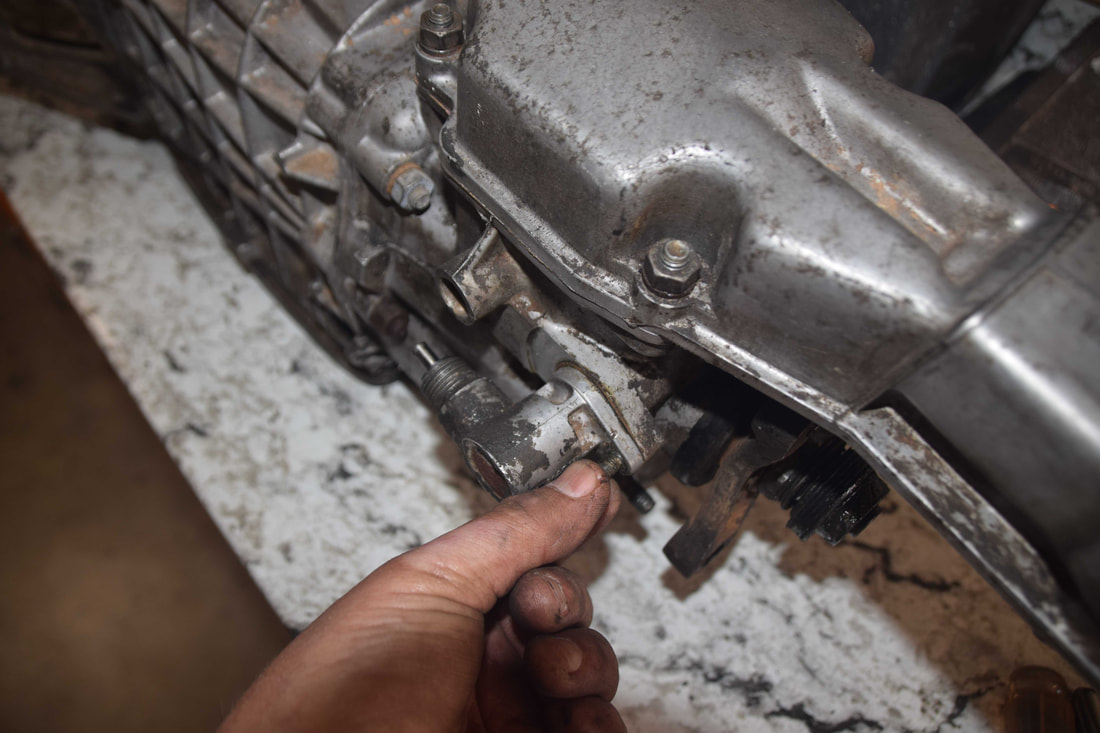
Pull speedometer drive assembly from the transmission casing. Remove gasket.
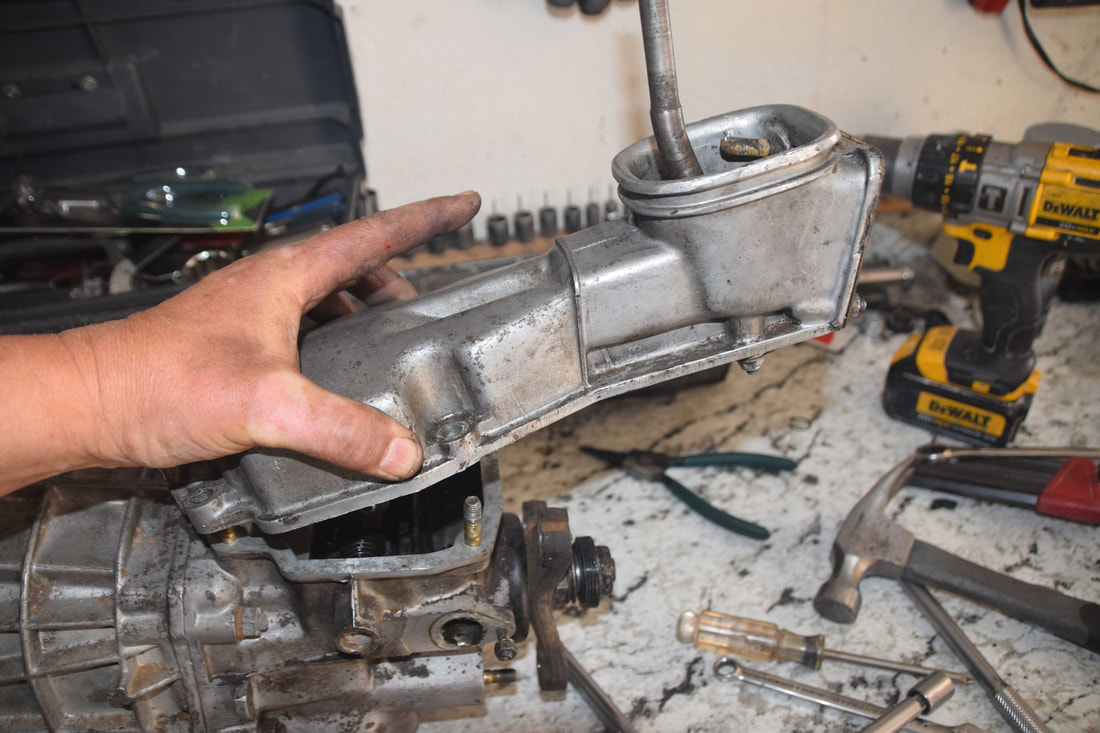
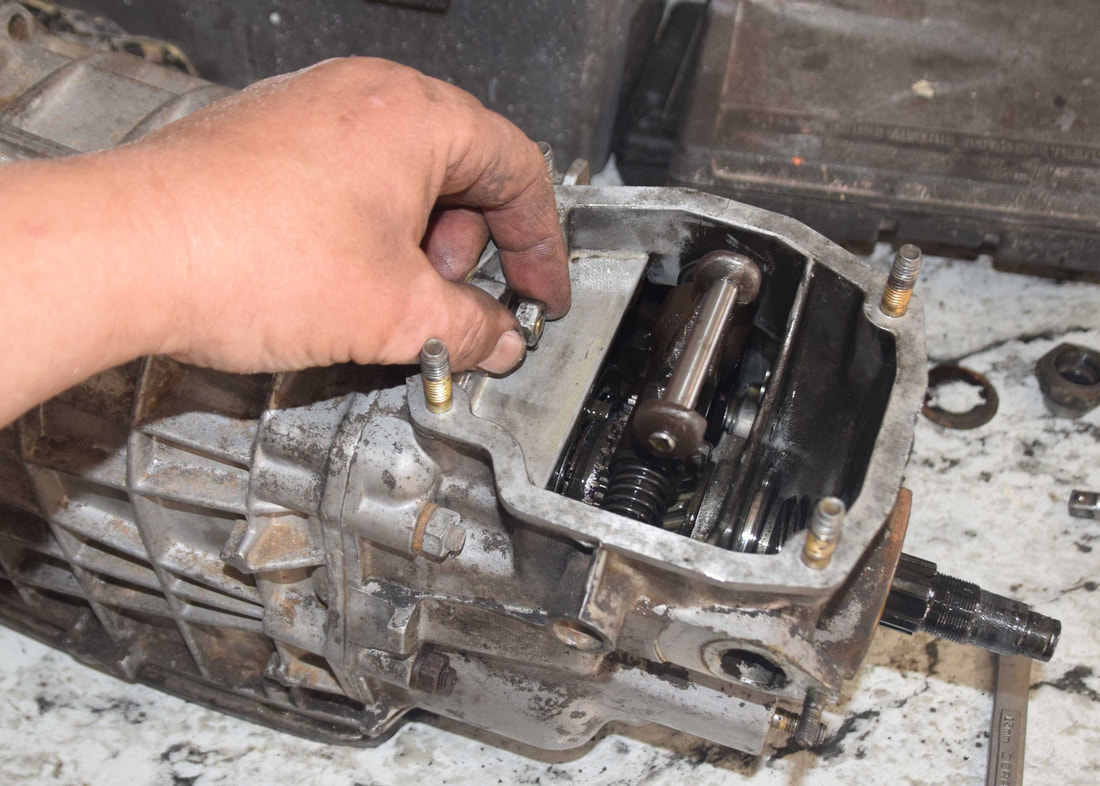
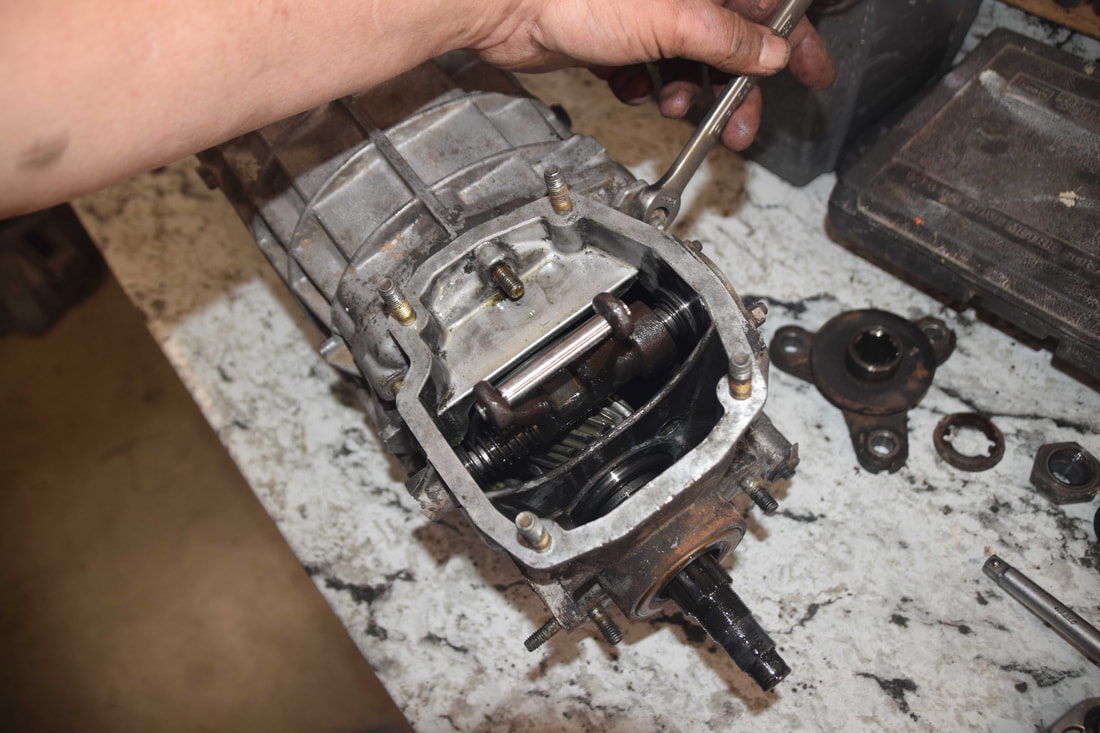
Shift housing
Remove the nuts holding the shift housing to the transmission.
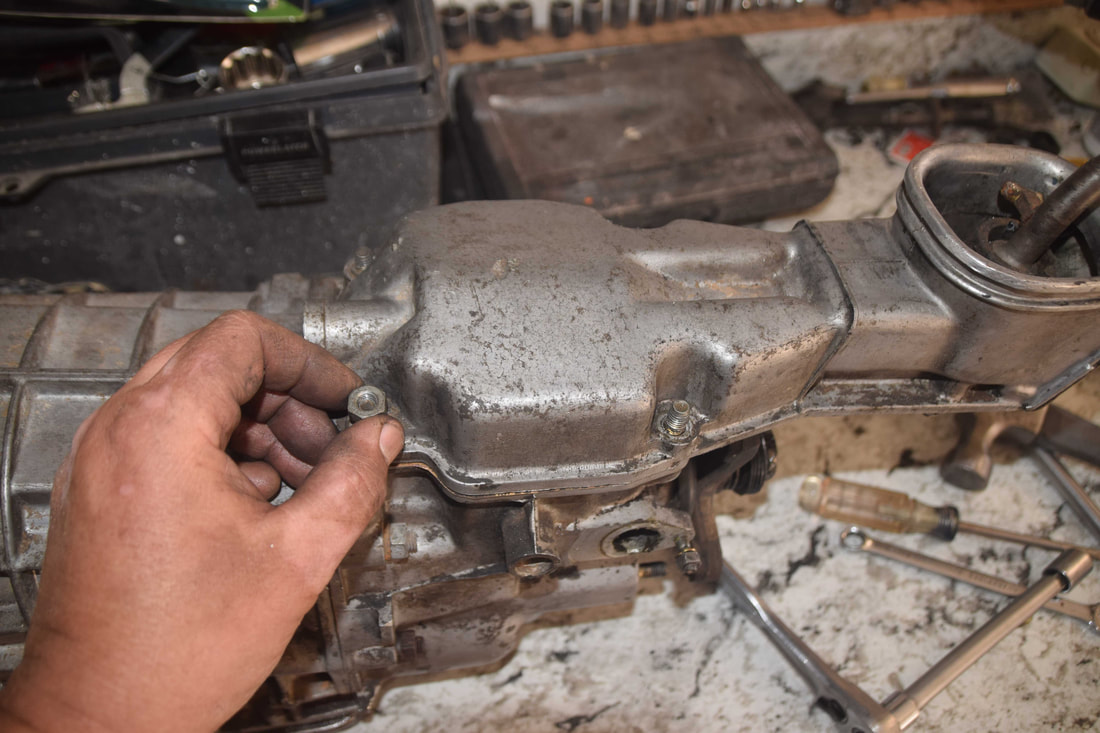
Remove shift housing assembly and gasket
Rear yoke assembly
Using a set of circlip pliers, remove the circlip at the end of the yoke assembly.
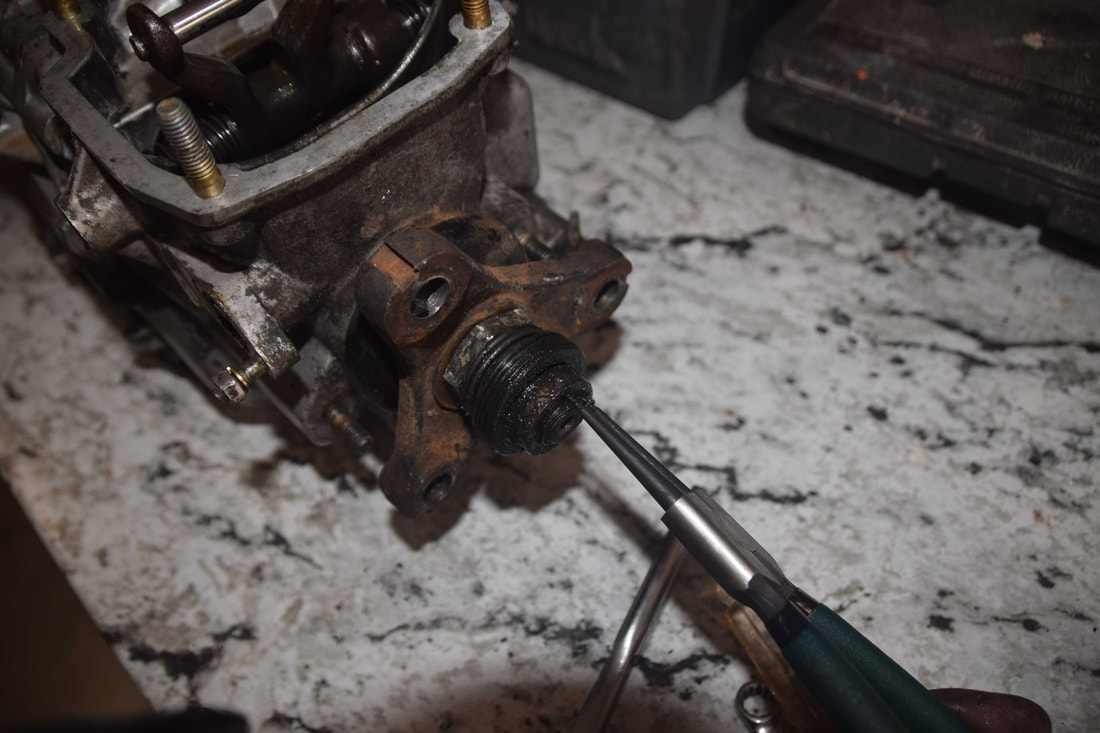
Circlip removal

Using a pulley removing tool (not shown), remove the spacer.
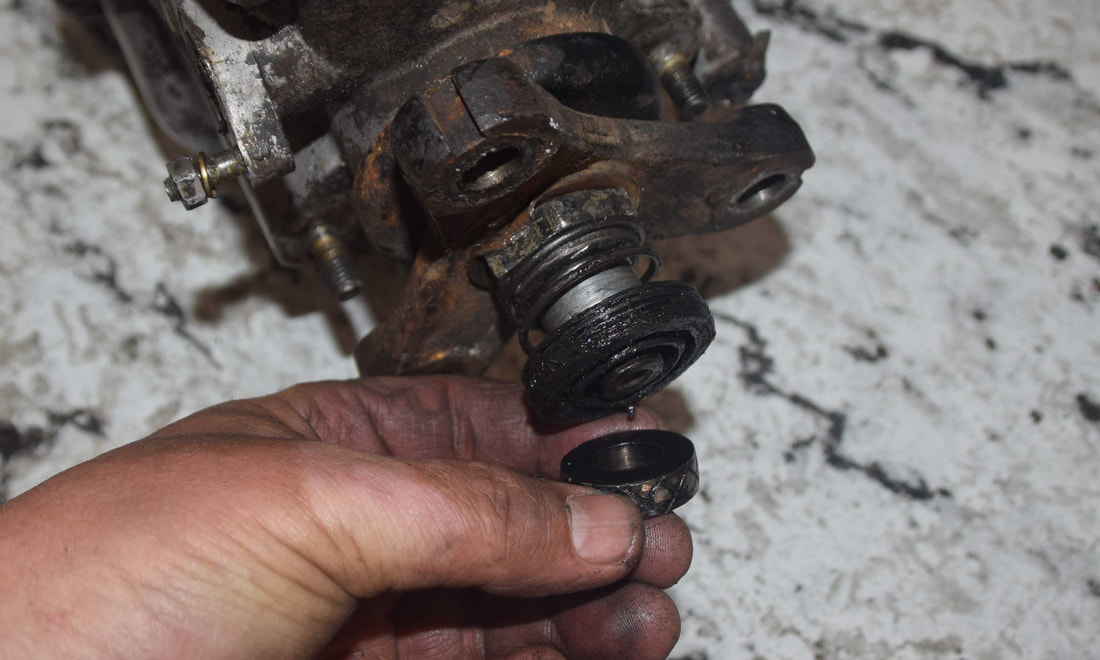
Remove seal and spring
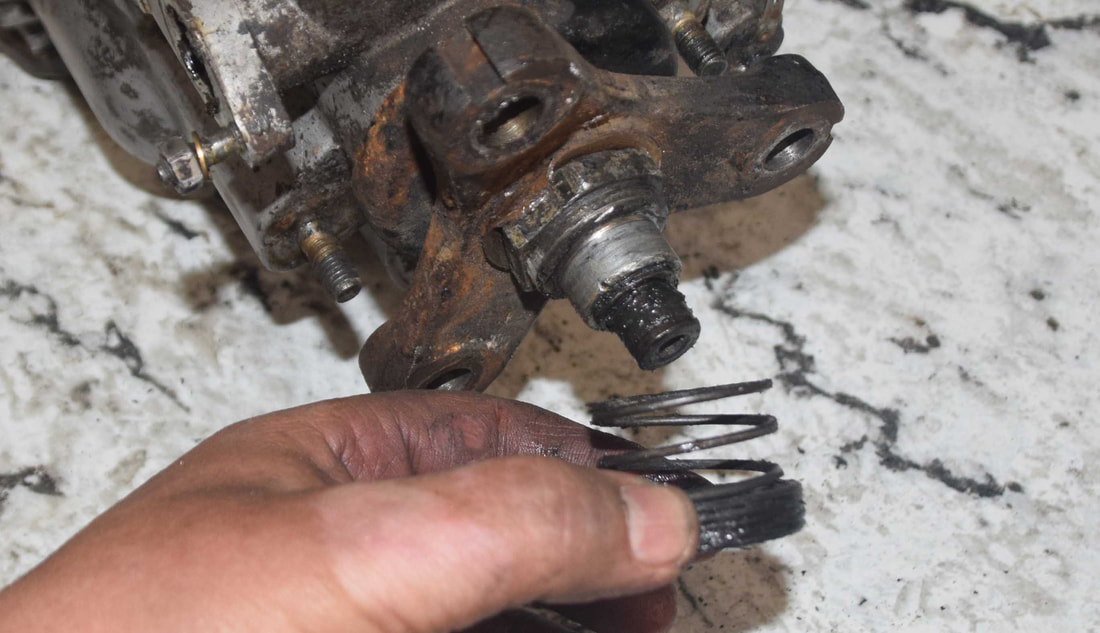
Nut removal.
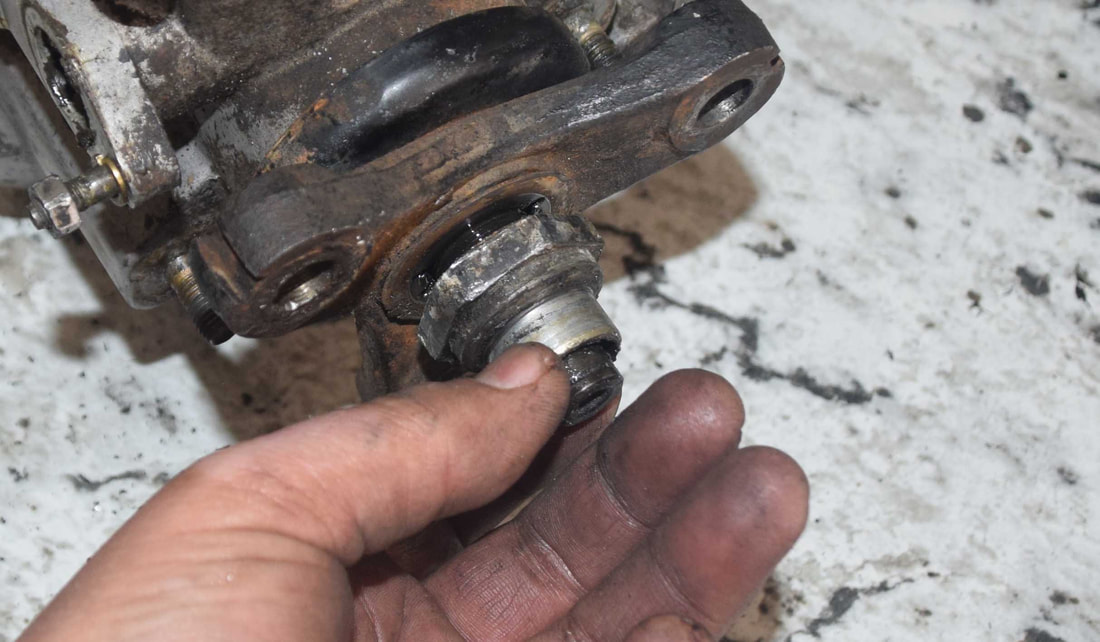
Washer removal
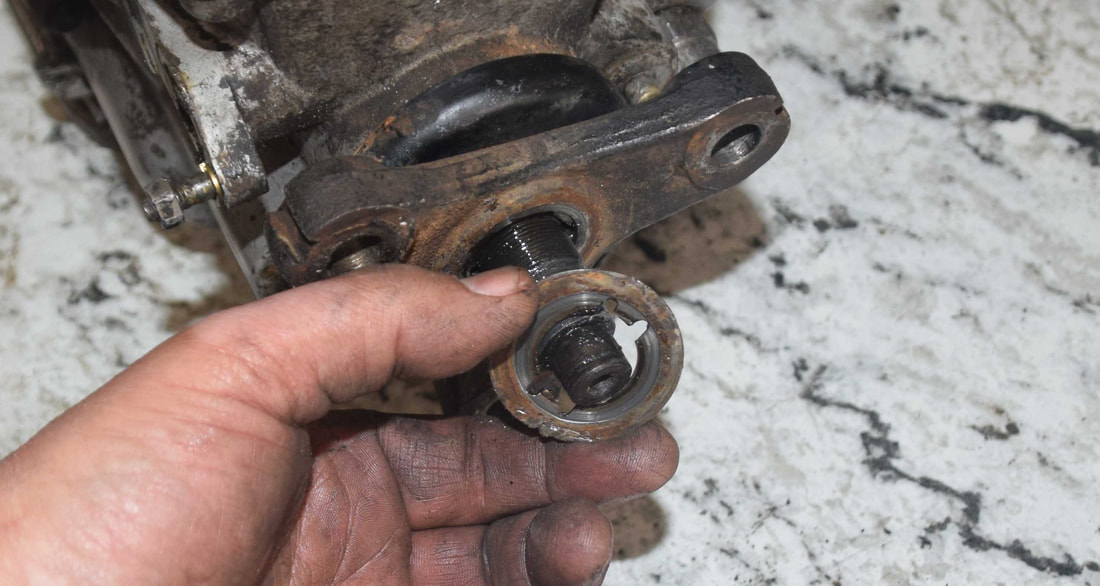
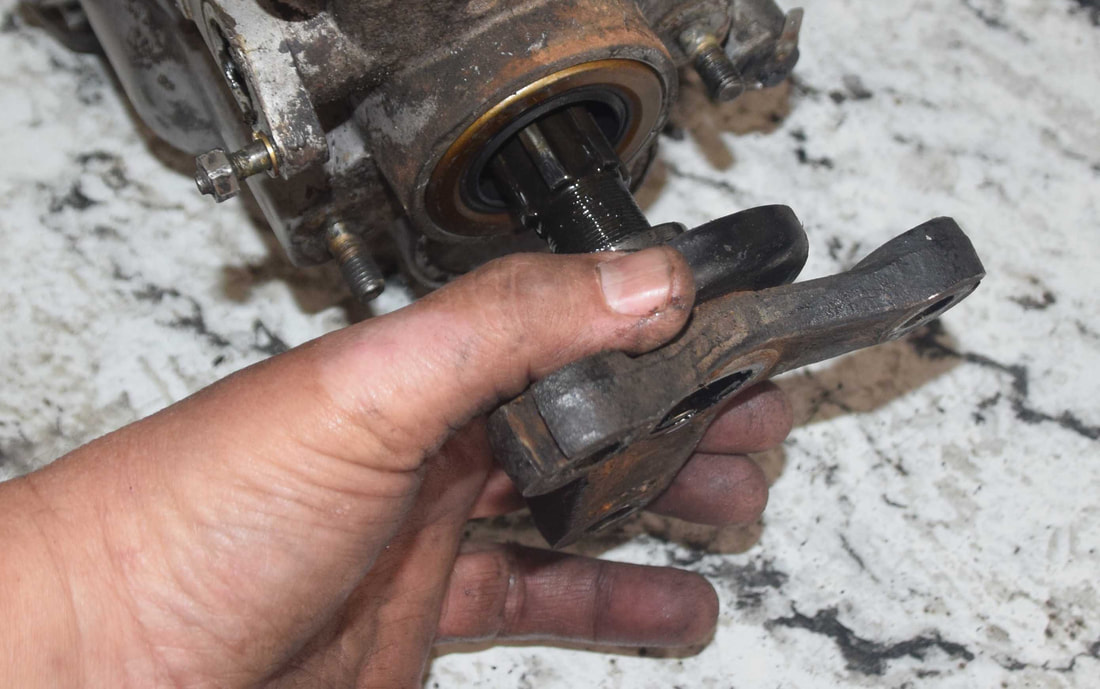
Remove yoke
Bell housing removal
After removing clutch fork and idler bearing, remove the bolts holding the bell housing to the transmission case.
When the bell housing is separated from the transmission case, ensure to note the orientation of the spring washer/thrust washer.
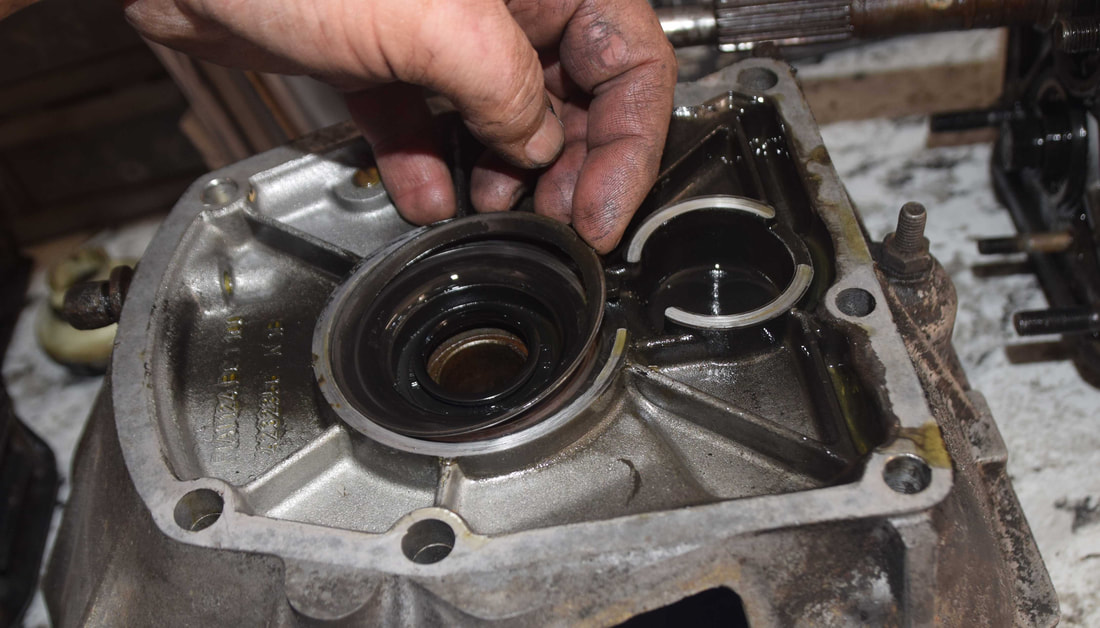
Rear 5th gear and reverse housing removal
Remove the nut inside the rear housing
Remove nuts on rear casing
Remove transmission cover nuts and remove cover and gasket.
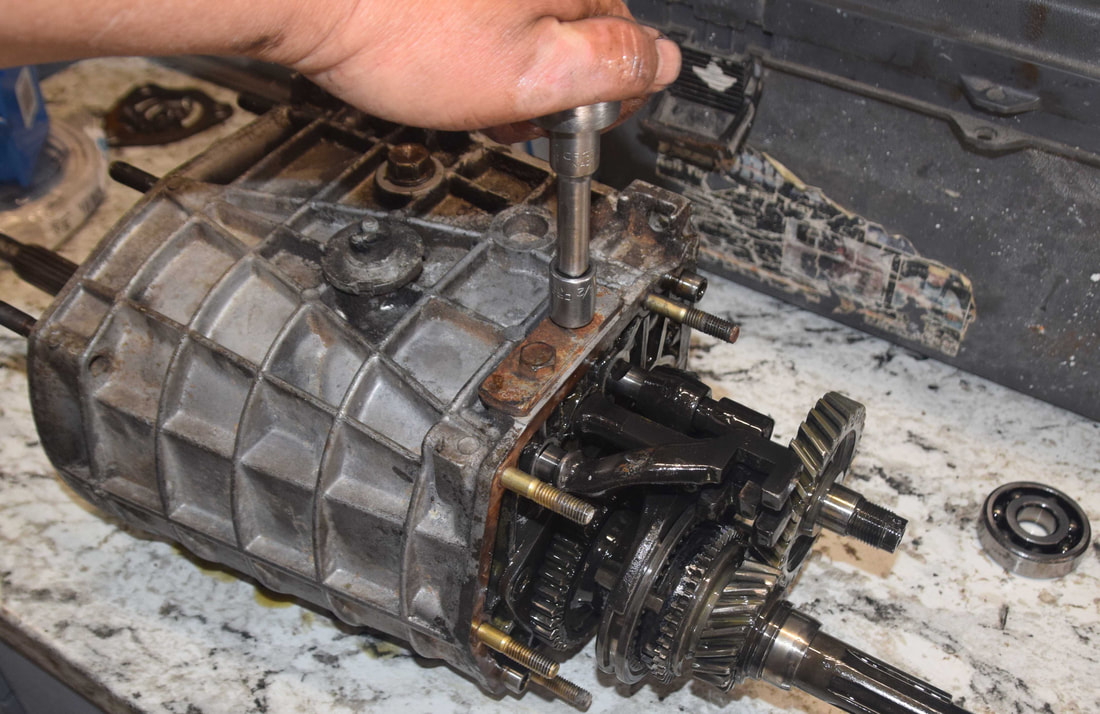
Remove nut from inside transmission case that secures the rear 5th gear/reverse housing to the transmission.
Remove rear case cover and gasket. It will take more effort than holding the stud at the top (ha, ha). I just happened to be holding it there.
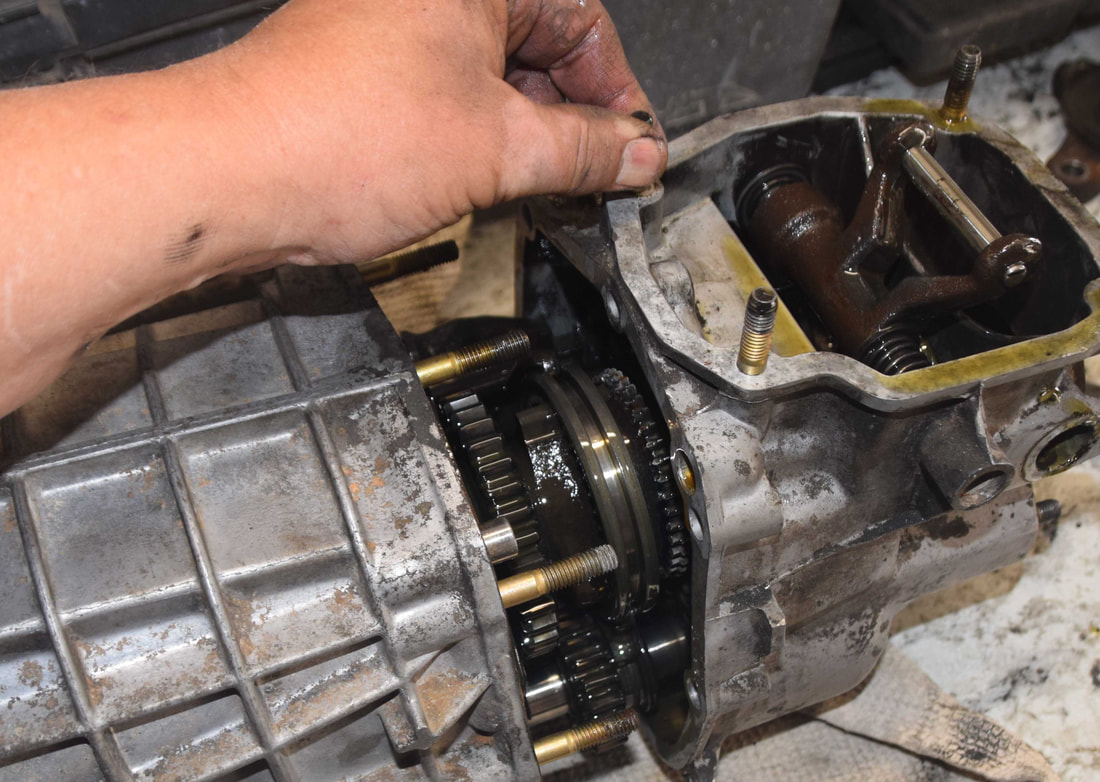
Removal of rear housing
Disassembly of 5th gear/reverse assembly
If you've reached this point, you are in deep. Now is the time to really ensure that you are watching the details regarding disassembly, orientation of washers and bearings and how the general assembly is constructed. Again, organization and photos help immensely!
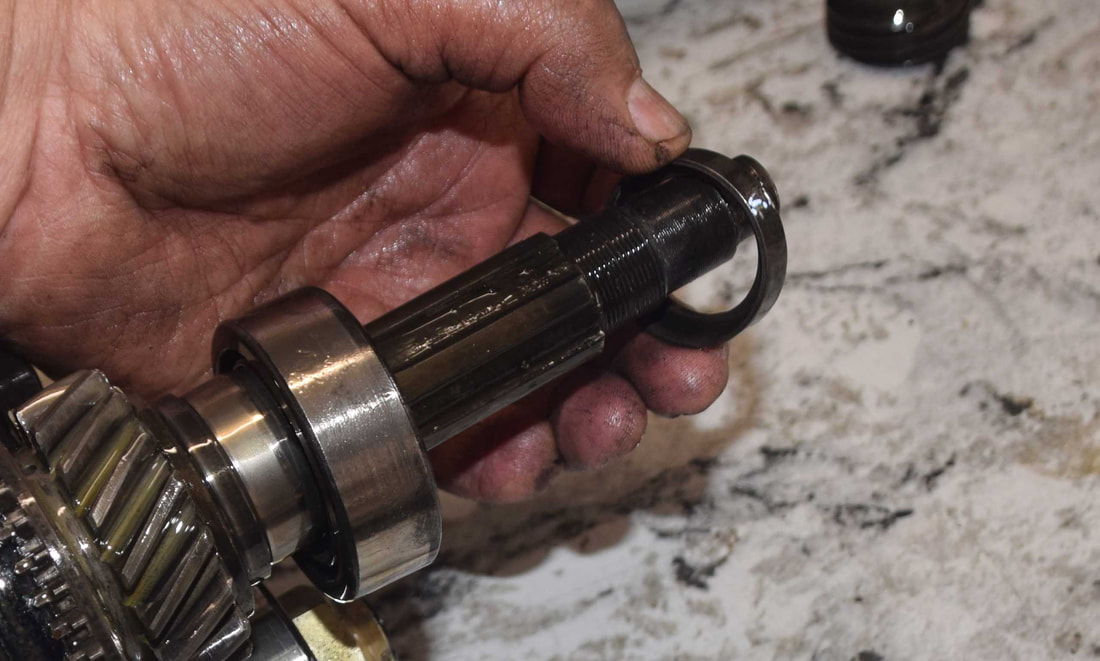
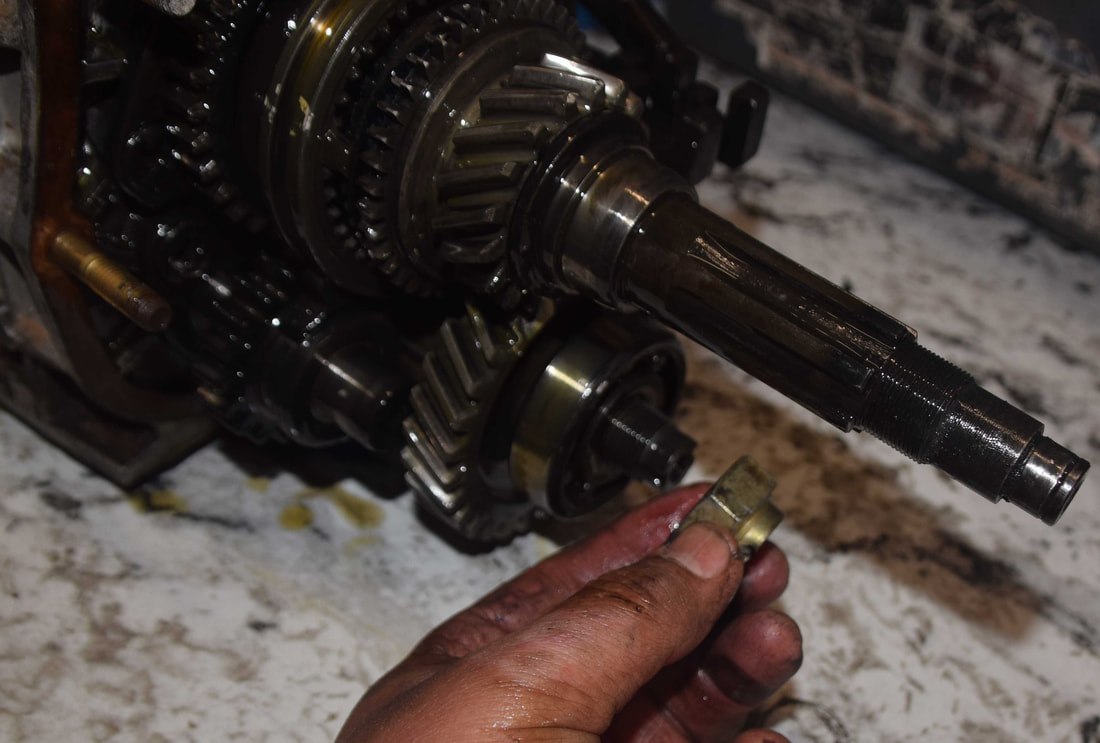
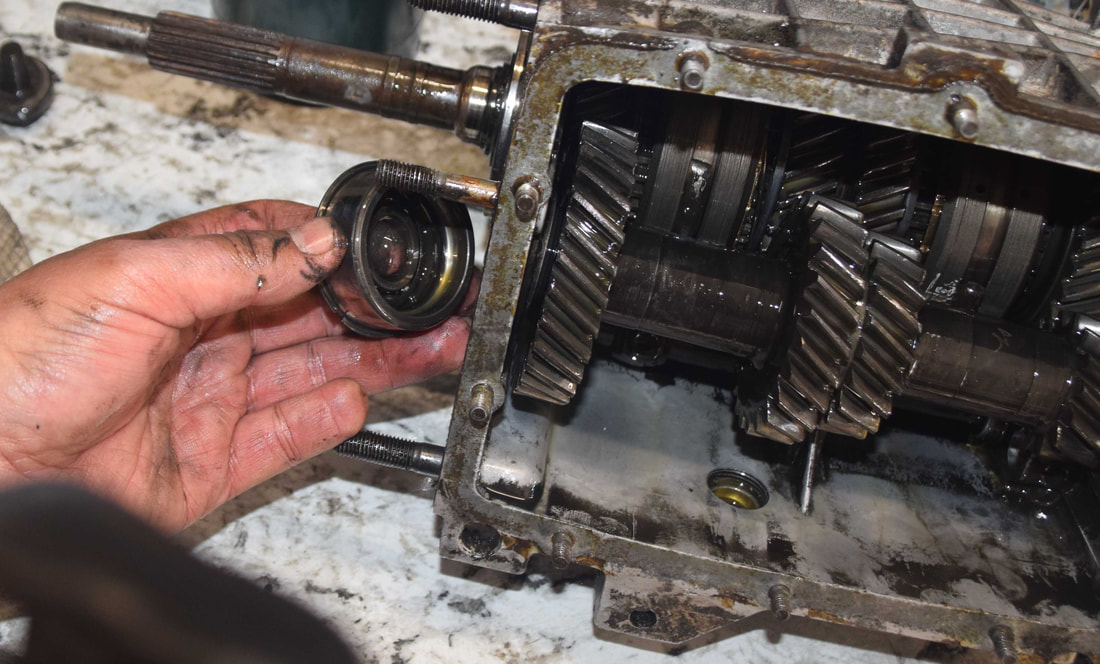
To remove the speedometer drive gear, simply slide off of the main shaft assembly. Beware - there is a ball bearing that can fall out! You do not want to lose this ball bearing.
Use a magnet to remove the ball bearing.
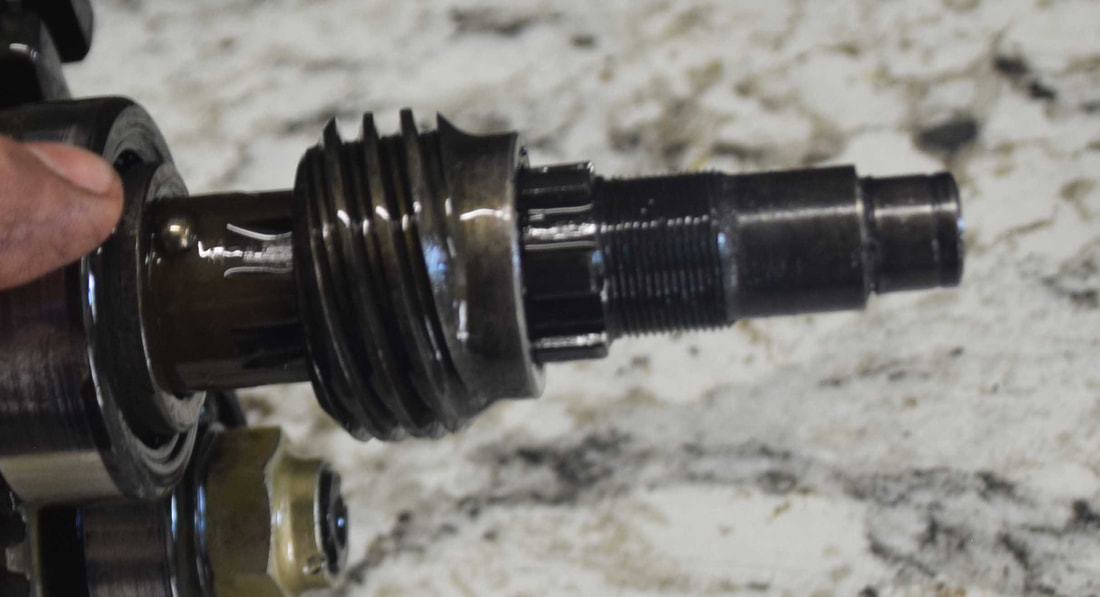
iRemoval of the bearing spacer. Note that the flat side of the spacer is facing the ball bearing (above), and the open end is facing the bearing (below). This orientation is critical.
The bearing and inner race will next be removed. Note that the inner race may remain on the shaft as the bearing is removed. Both pieces slide off.
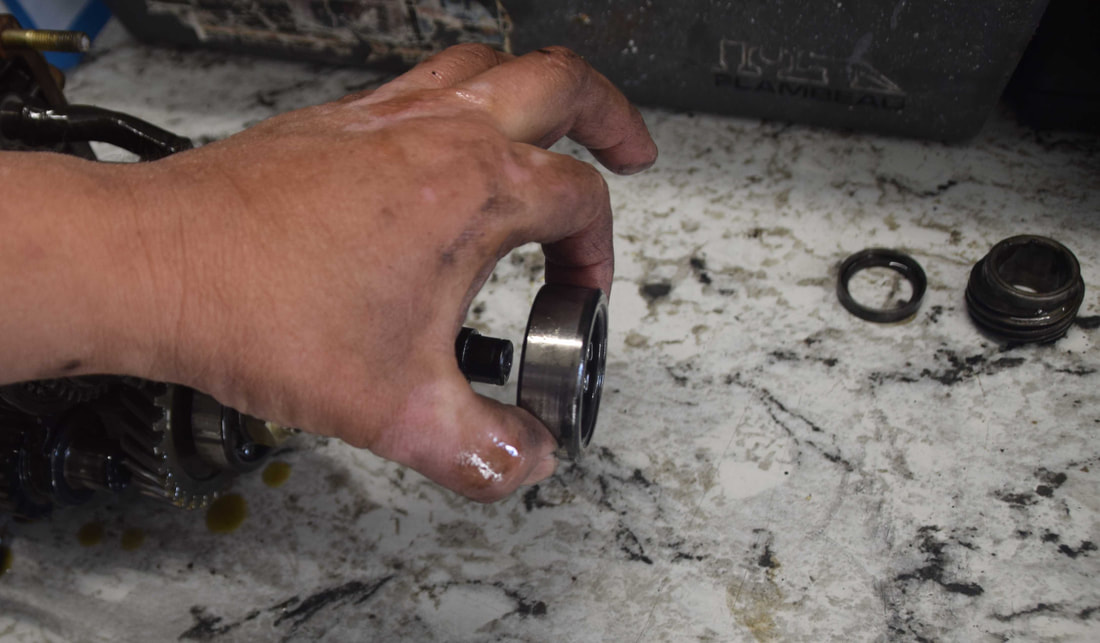
Remove the nut on the layshaft.
Remove the rear layshaft bearing. As a side note, the race for the rear main shaft bearing is still on the main shaft as shown in the photo above.
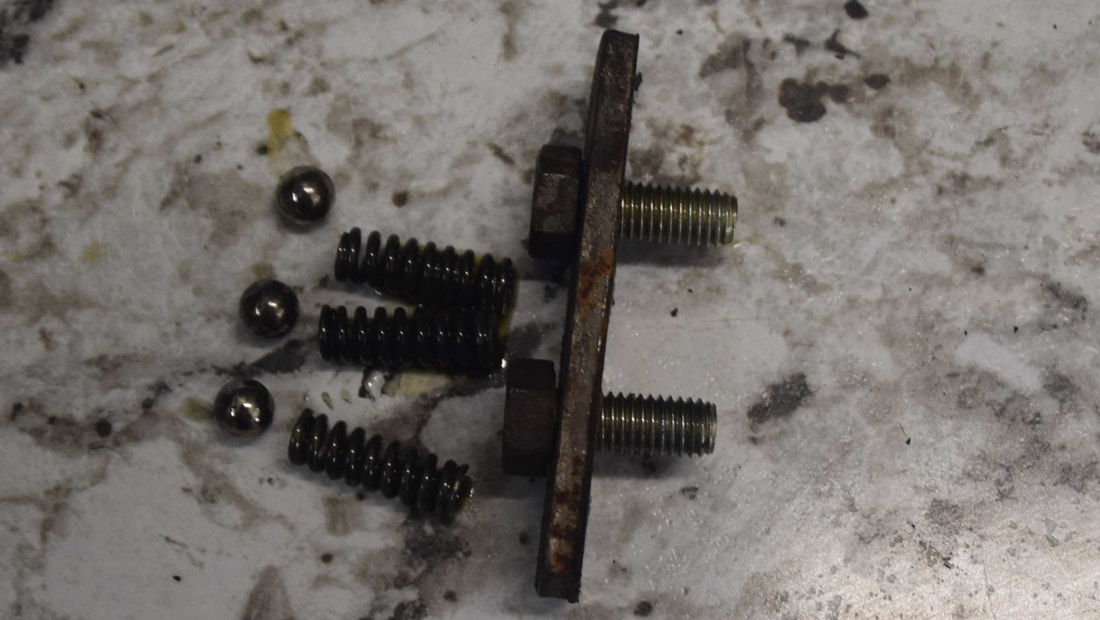
Detent balls and spring removal
On the side of the casing is a metal plate cover with two bolts. This houses the detent springs and ball bearings. All three springs and bearings are interchangeable. Remove the cover.
With cover removed:
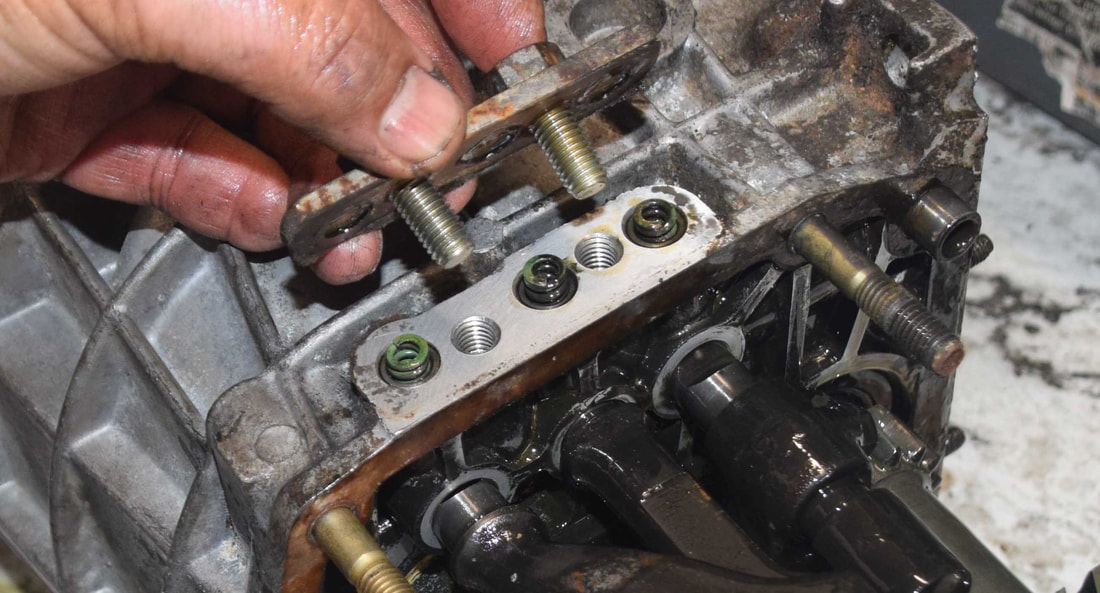
Remove three springs

Using a small magnet, remove the detent balls. If you do not have a magnet small enough, the transmission case can be turned so the three ball bearings can fall out. Be careful not to lose the detent balls.
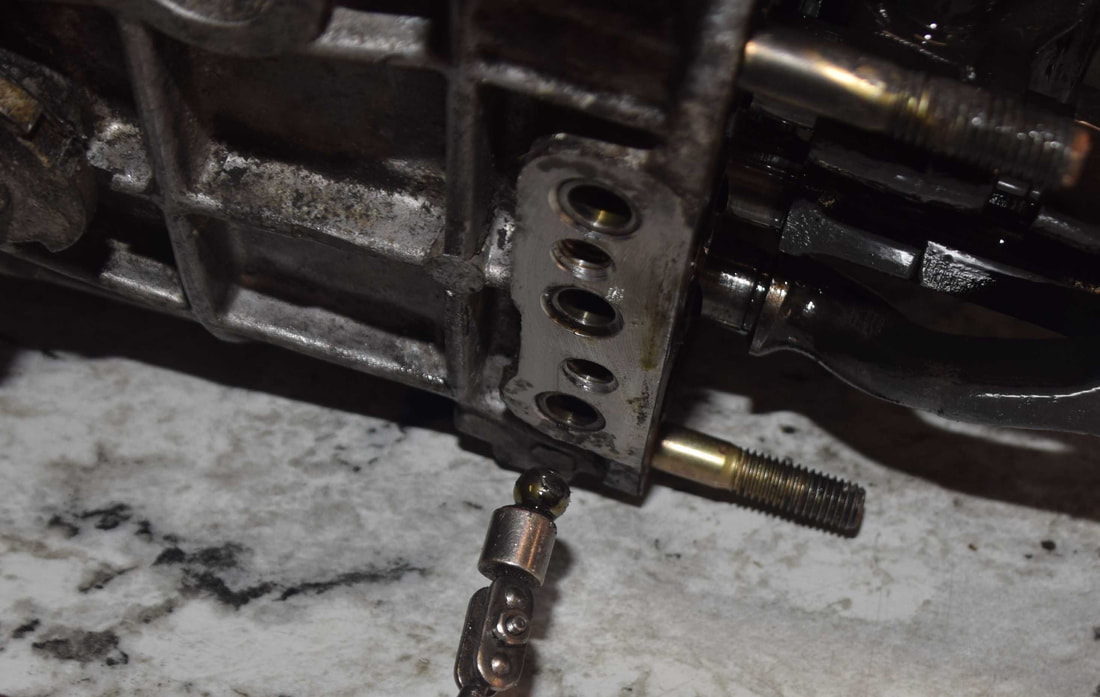
Detent balls and springs set aside for cleaning and inspection.
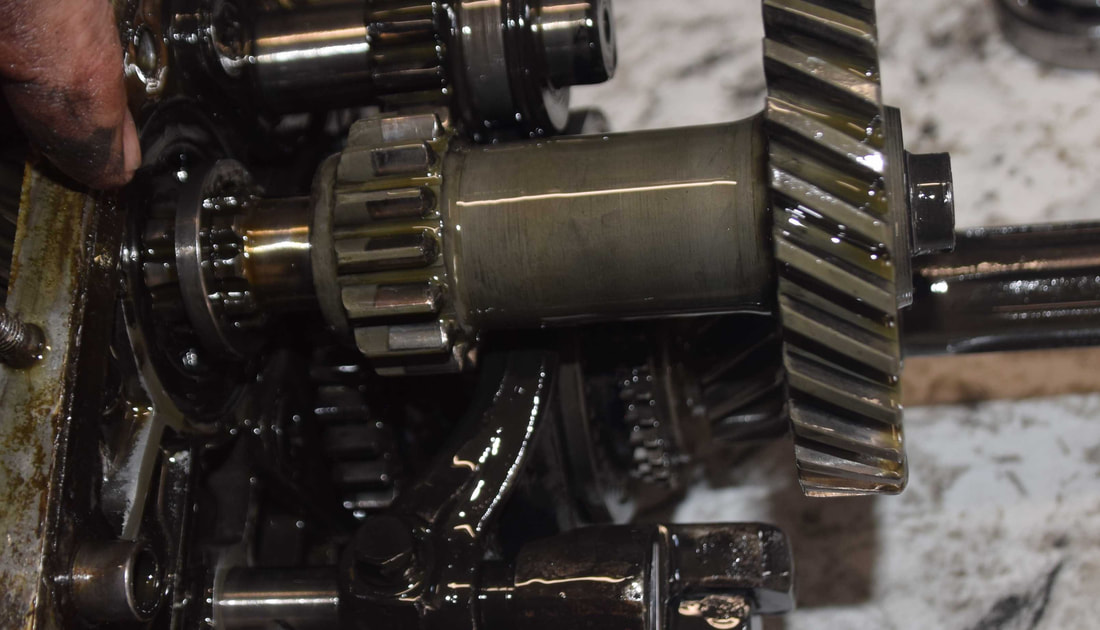
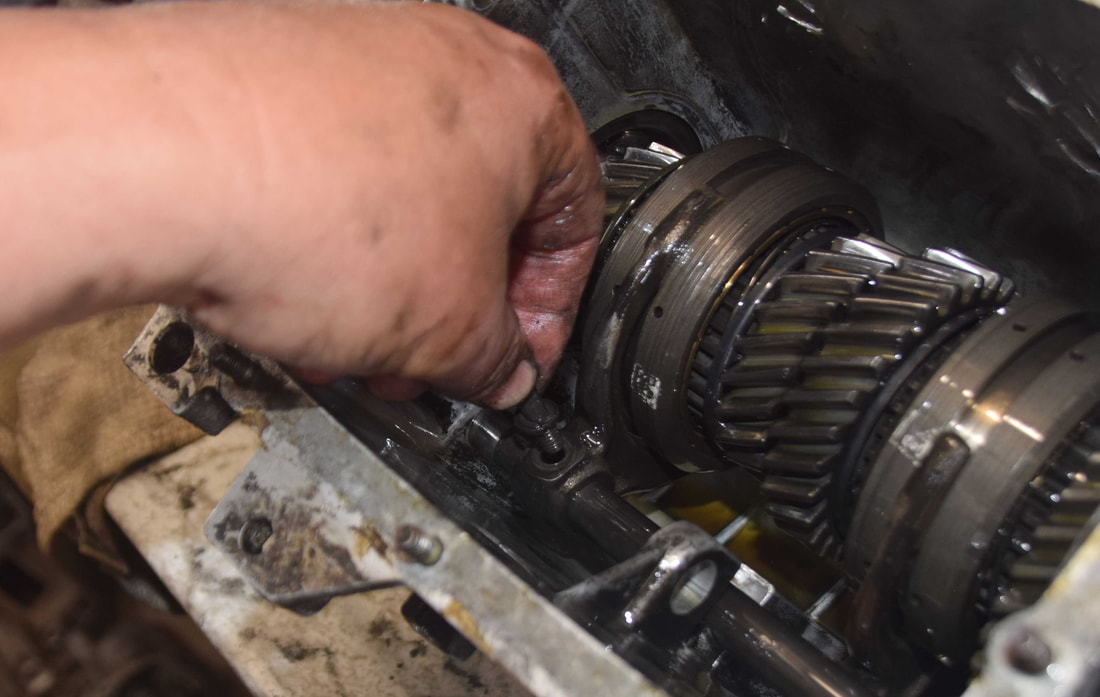
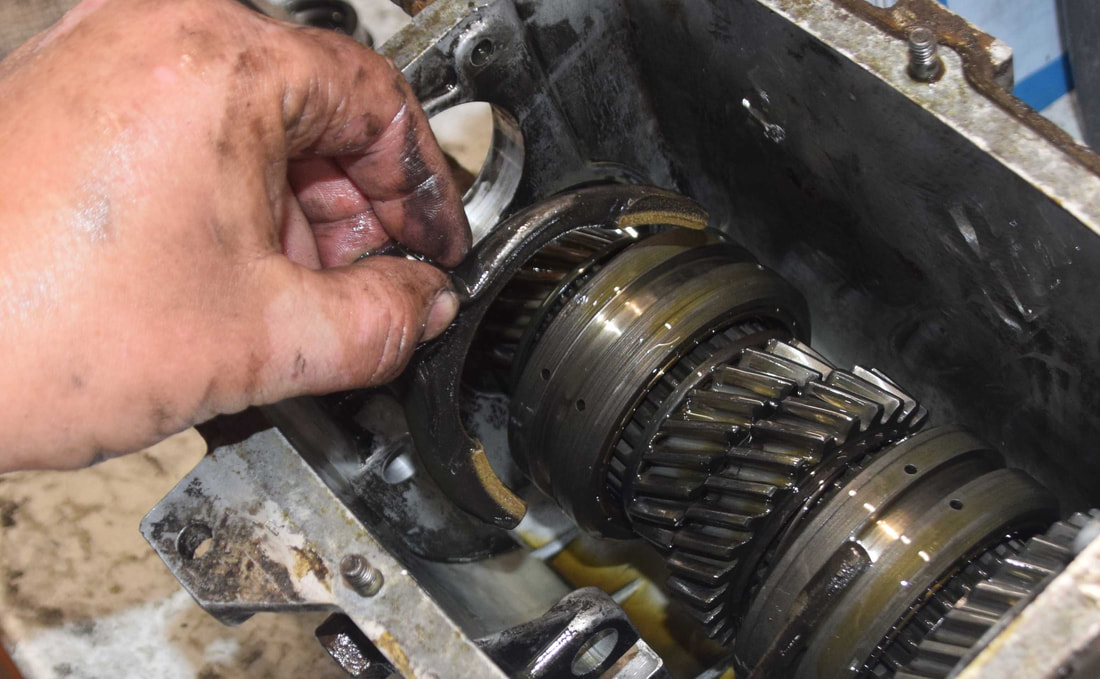
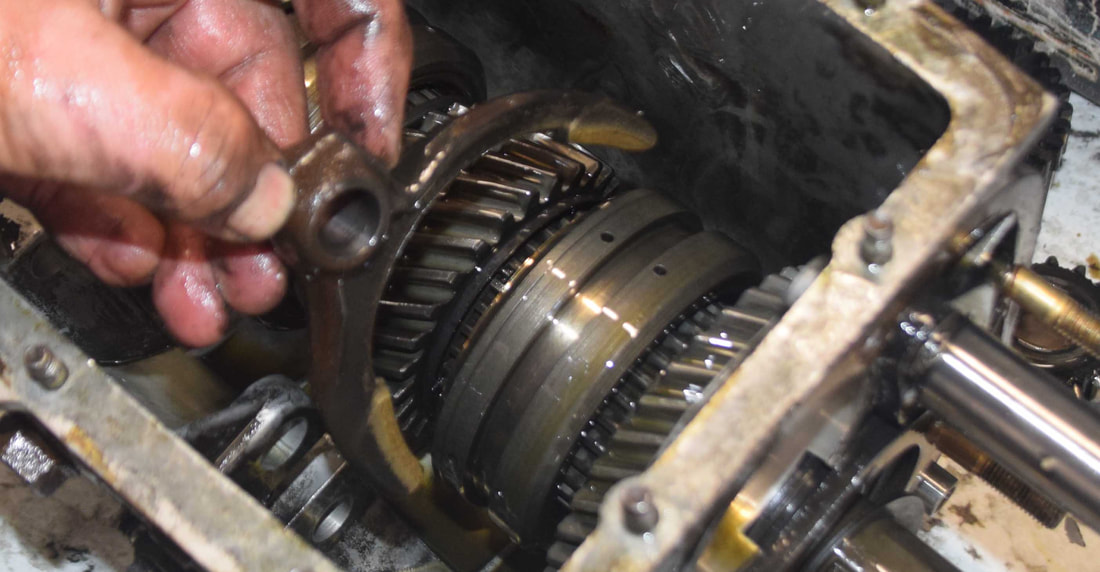
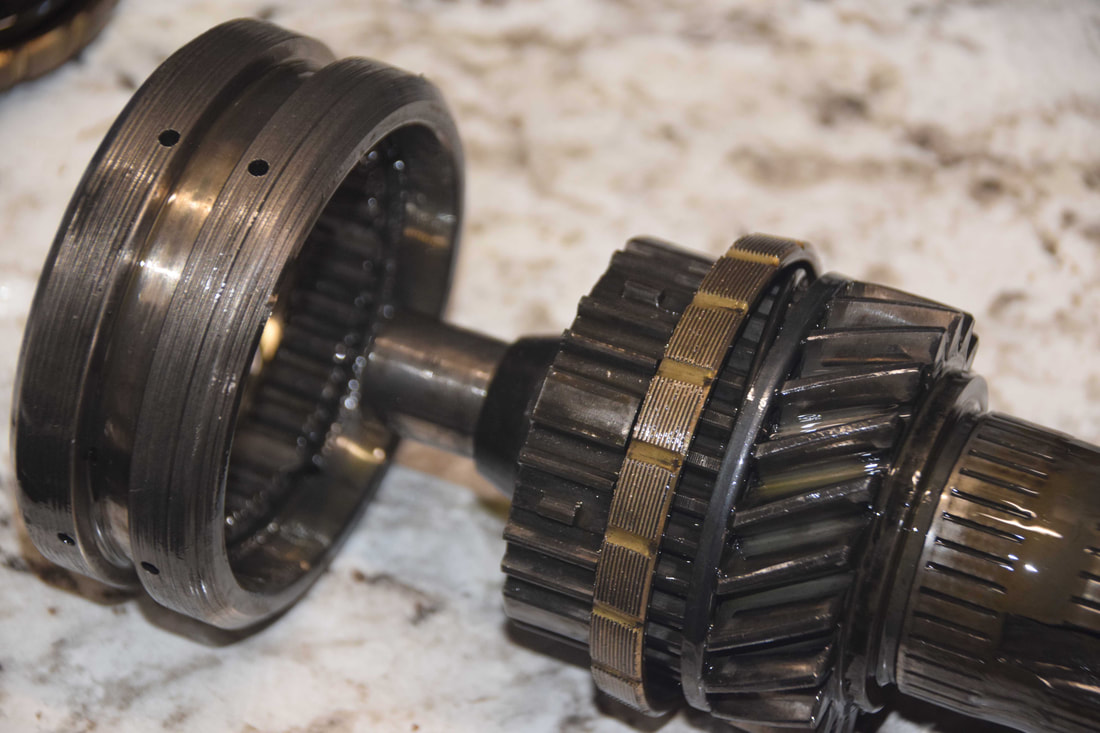
5th/reverse gear and synchro assembly removal
Multiple components must be removed off of the main shaft and layshaft assembly in this state. Note how the shift fork is oriented on the various sleeves. Remove the parts slowly to ensure they come off one at a time.
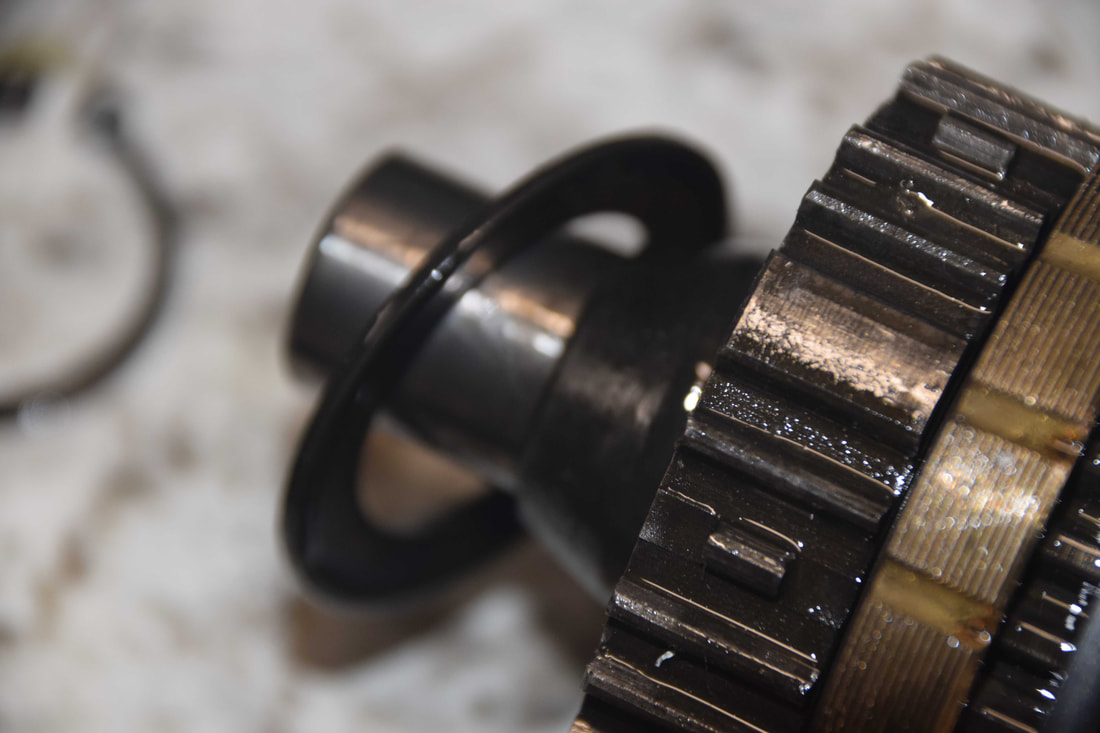
Spacer: Note that the Fiat factory shop manual references the spacer in this photo located between the 5th/reverse gear and the midshaft bearing. The Haynes manual does not reference it, but shows it in one of the images on transmission disassembly. The spacer is included with the new midshaft bearing. Sorry for the greasy fingers. :)
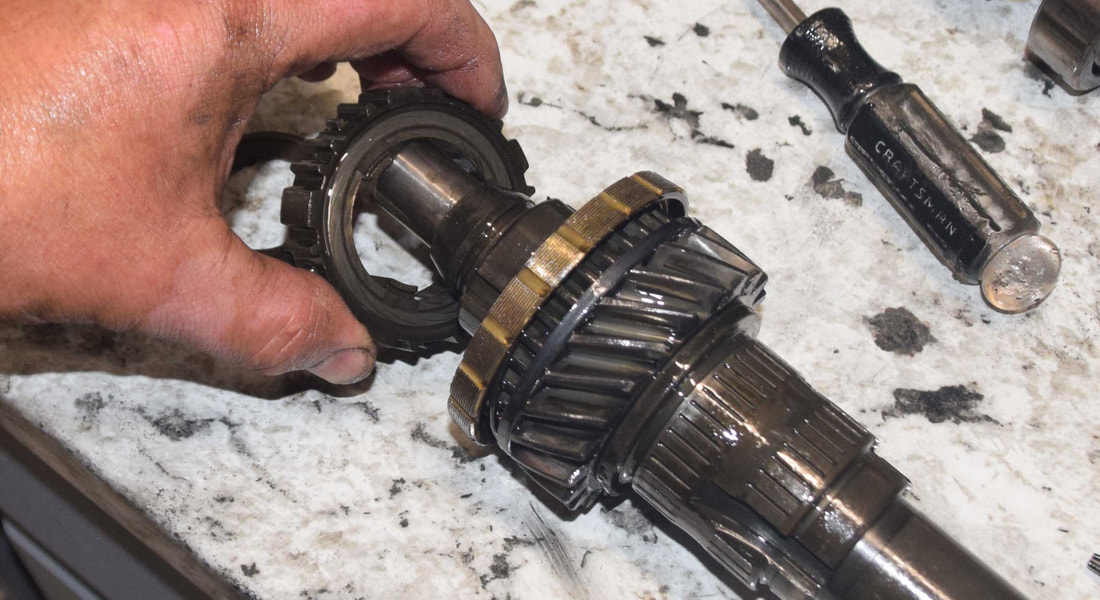
Slide 5th/reverse gear off of layshaft. The 5th gear shift fork assembly, reverse idler gear and 5th gear assembly and sleeve will come off at the same time.
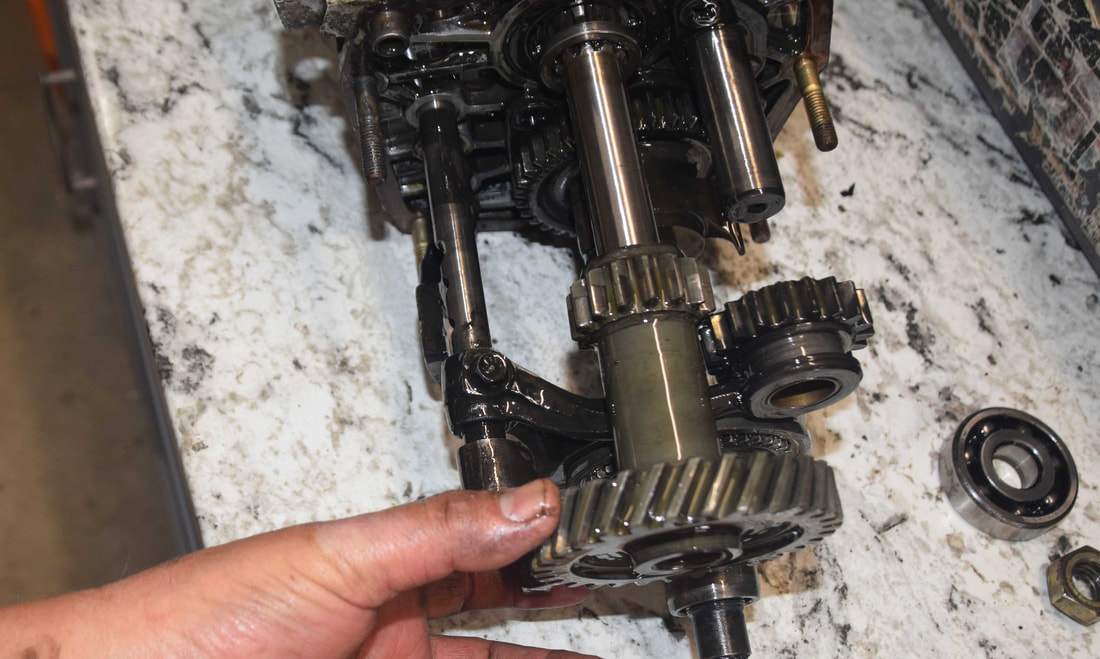
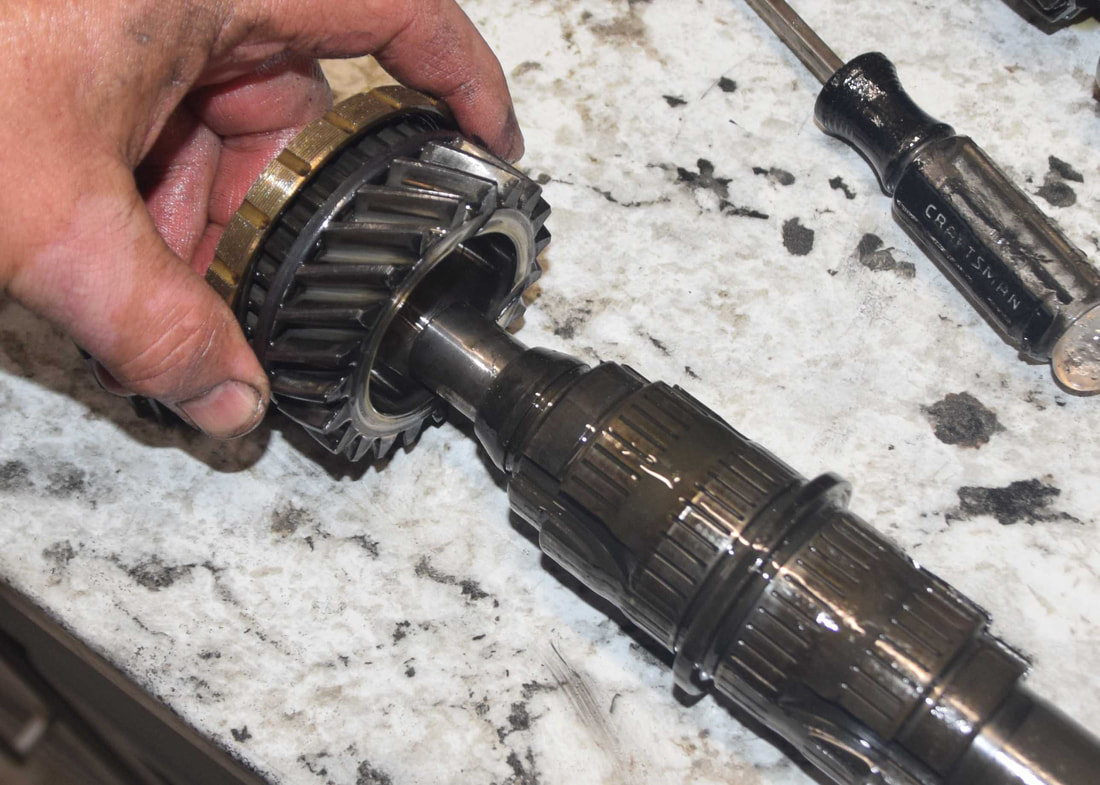
Remove the hub and spacer from the mainshaft.
If not already removed, remove the spacer from the mid layshaft bearing.
Remove reverse gear. Note that the flat side of the gear faces the spacer/spring washer and the transmission case and bearing.

Remove woodruff key and spring washer/spacer from the main shaft. Note in the photo the direction of the spring washer/spacer.
Layshaft removal
Remove bearing from rear of the layshaft along with the inner race which faces the gear box (shown in photo).
Remove bolt and washer from front of layshaft.
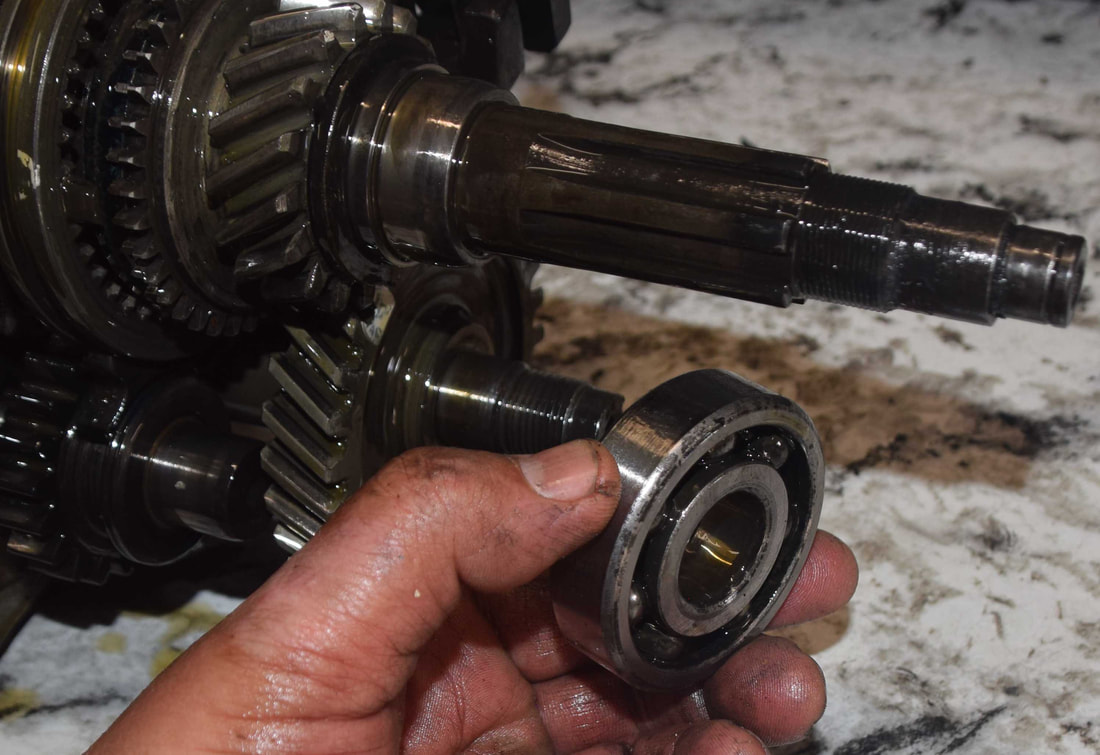
Remove front layshaft bearing. Note that the rear roller bearing assembly is likely to separate from the bearing. Be cautious that you don't lose the ball bearings which are likely to fall out when the bearing is removed.
Remove layshaft by tilting and removing from the transmission case.
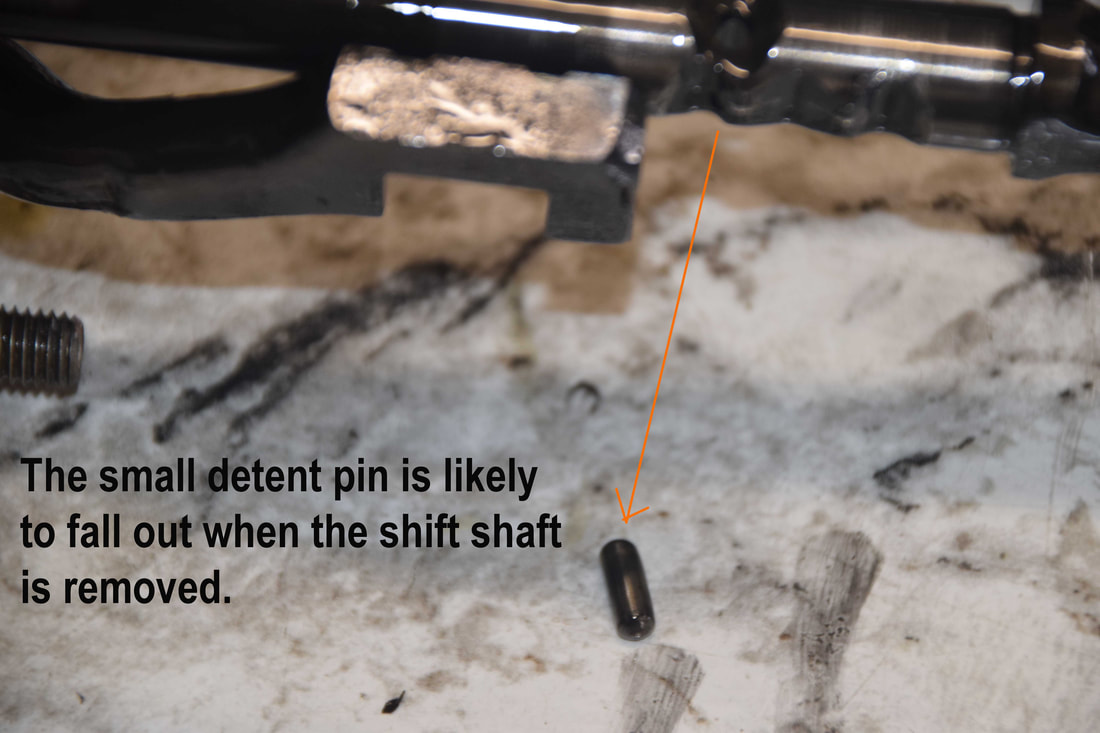
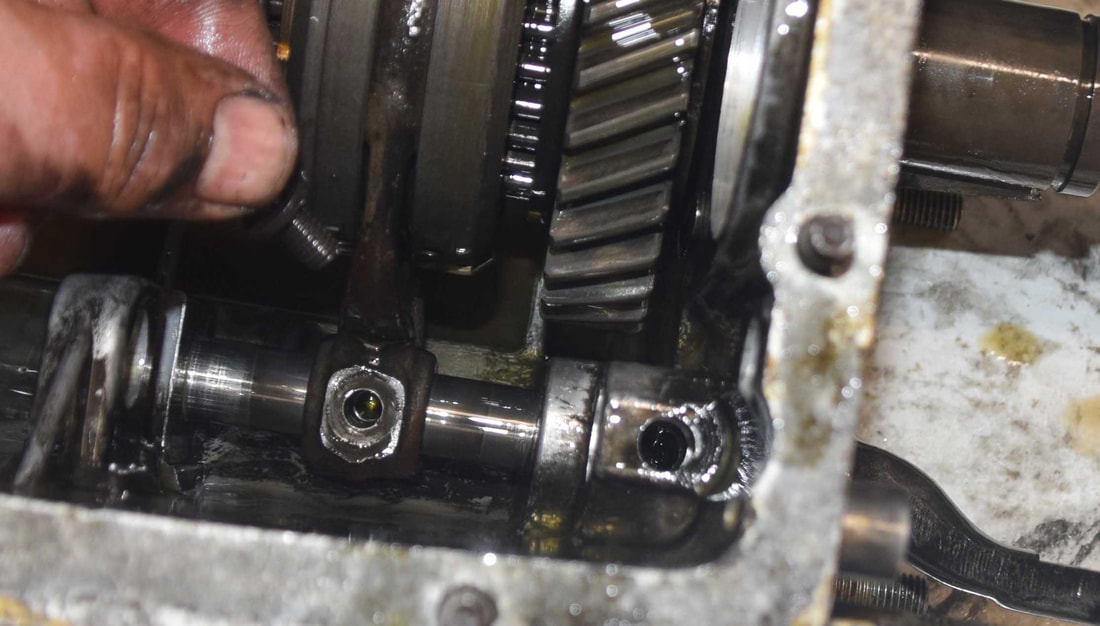
Detent pins/dowel/bean (so many names) removal
Why do they have so many names for the same part? Oh well, there are three detent pins - a longer fat one, a short fat one and a short thin one. The narrow pin fits into a bore on the center shift shaft. The other two sit in openings that run between the bores for the shift shafts. Use a magnet to remove them, noting which shift shaft that they correspond with.
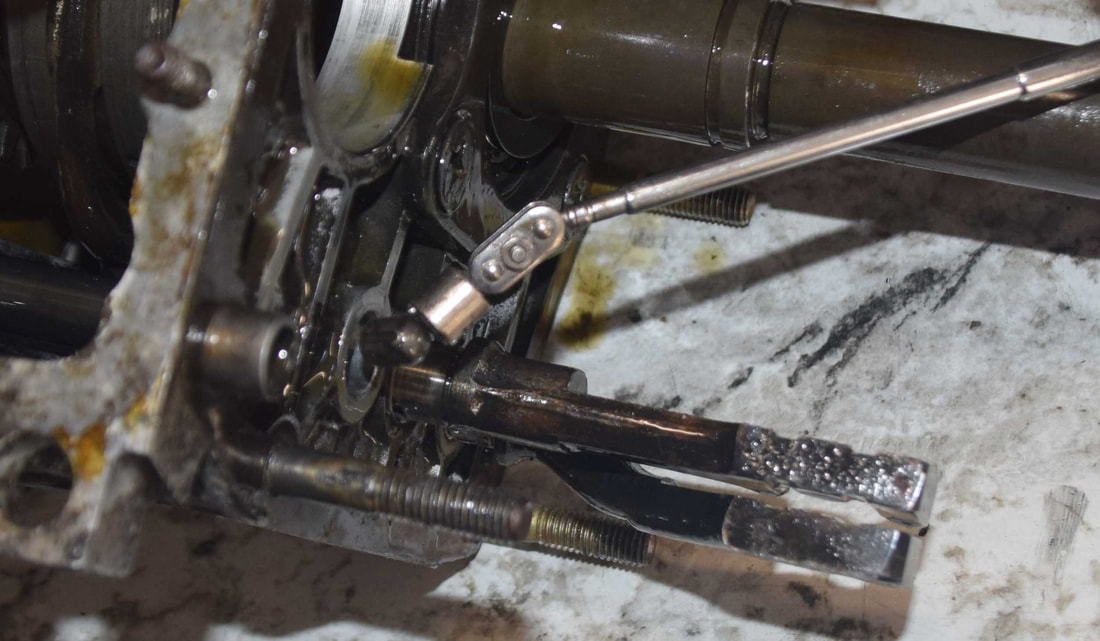
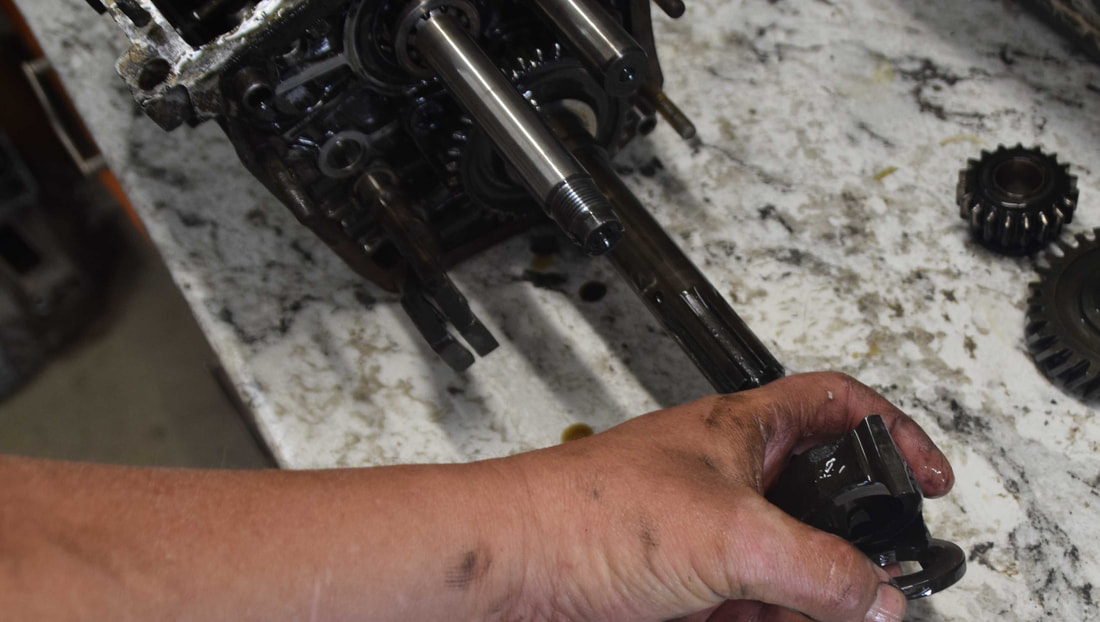
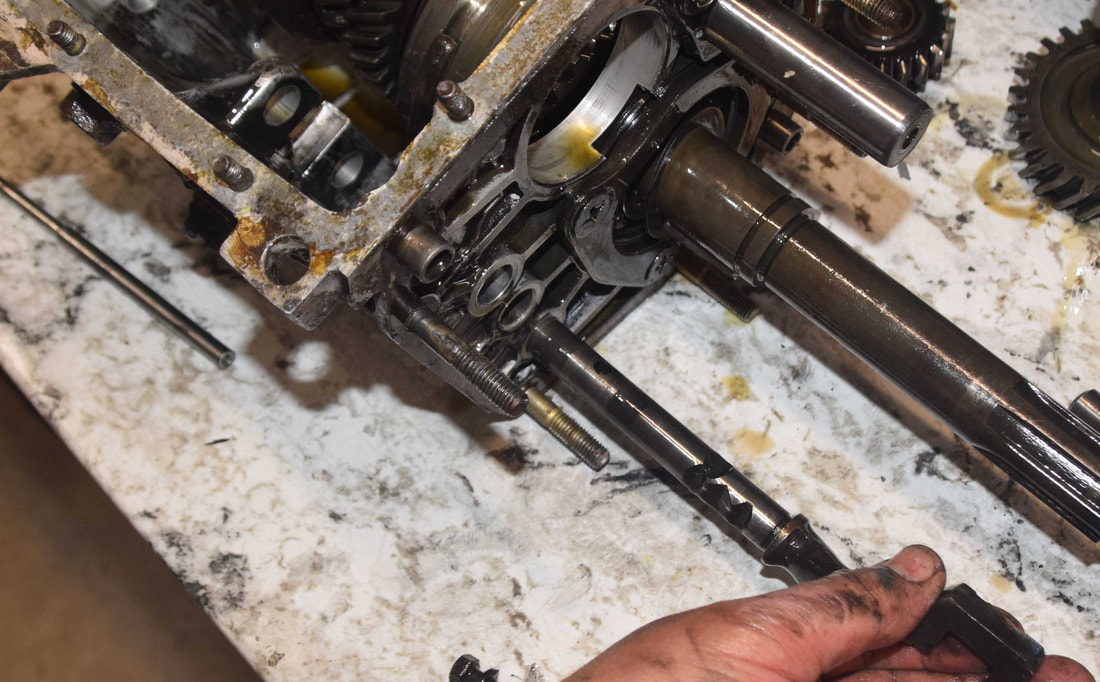
Remaining shift shaft and shift fork removal
Time to remove the shift forks and shift fork levers. Each has a 10mm nut with washer holding the shift fork to the shift shaft. Remove each one and pull the shift fork from the transmission case.
Slide shift shaft out of the shift fork and out of the transmission case.
Remove the shift fork for 3rd/4th gear.
Remove 10mm bolt and washer from 1st/2nd gear shift shaft.
Remove 1st/2nd shift shaft
Remove the final 1st/2nd gear shift fork
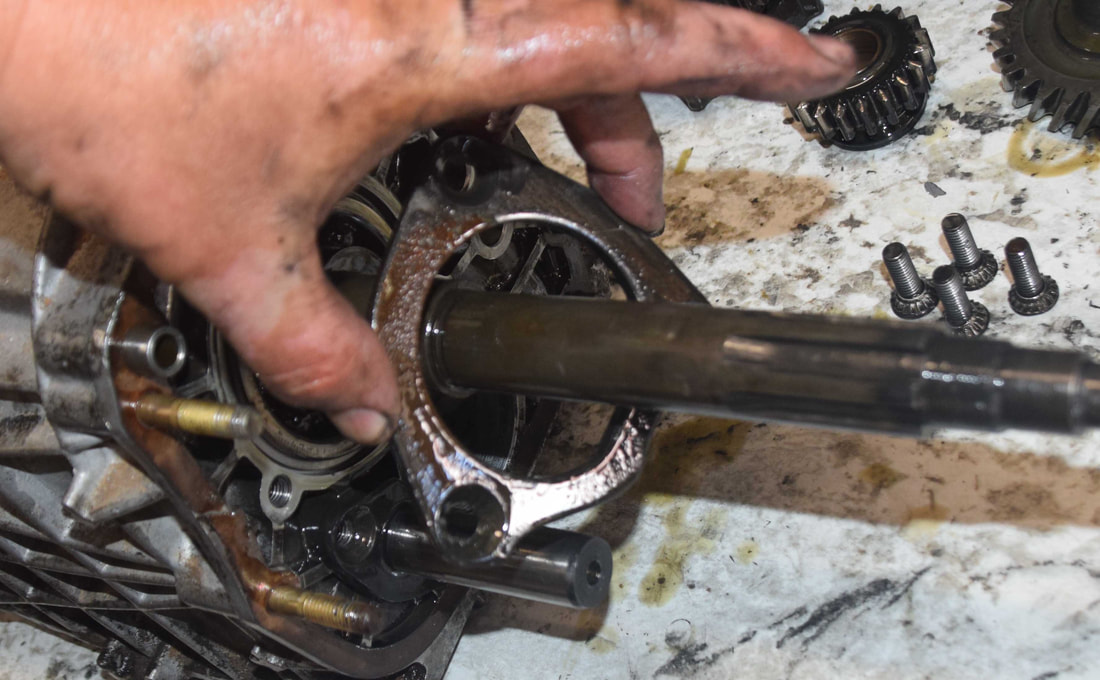
Main shaft removal
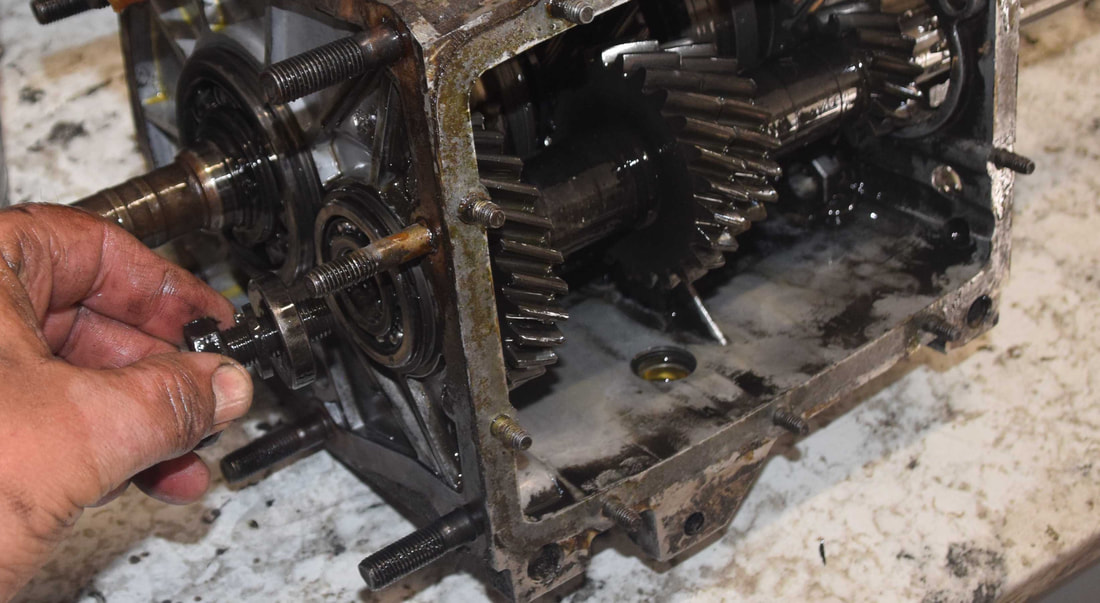
The main shaft is in two pieces - the 4th gear input shaft and the main shaft. First, remove the three screws holding the plate from the rear of the transmission case and remove the plate.
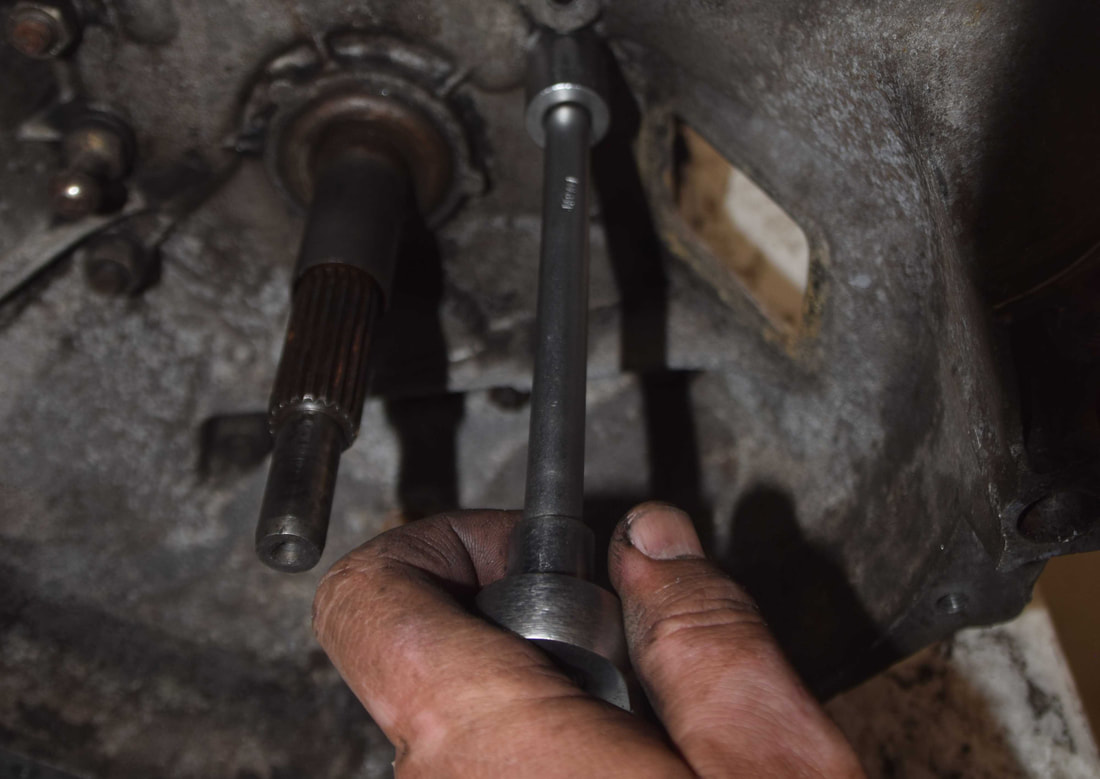
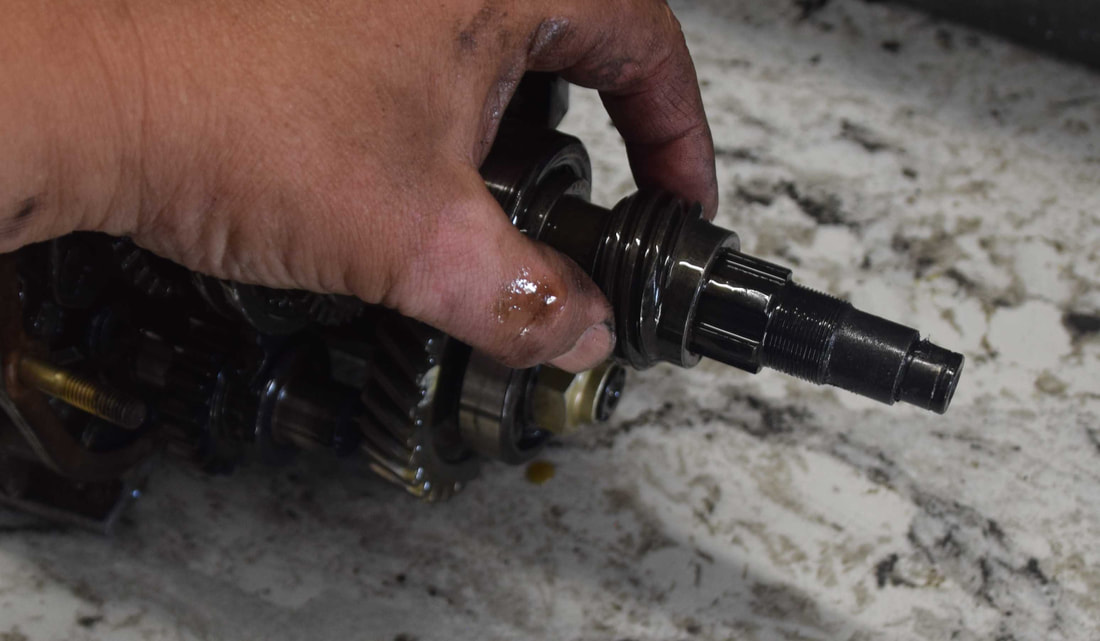
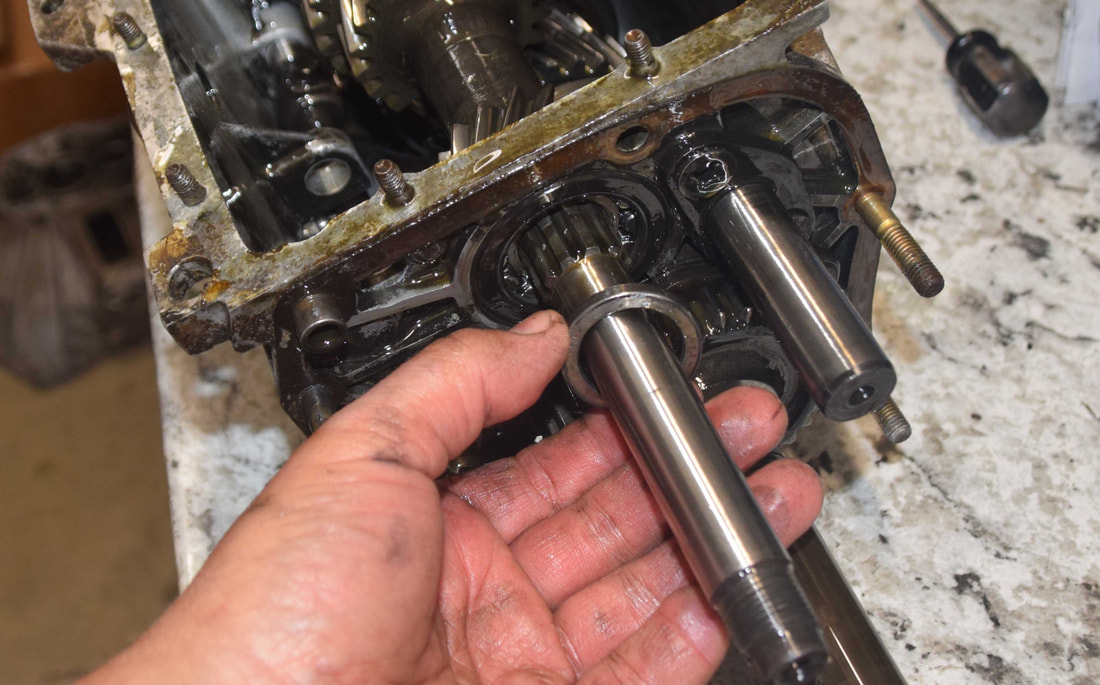
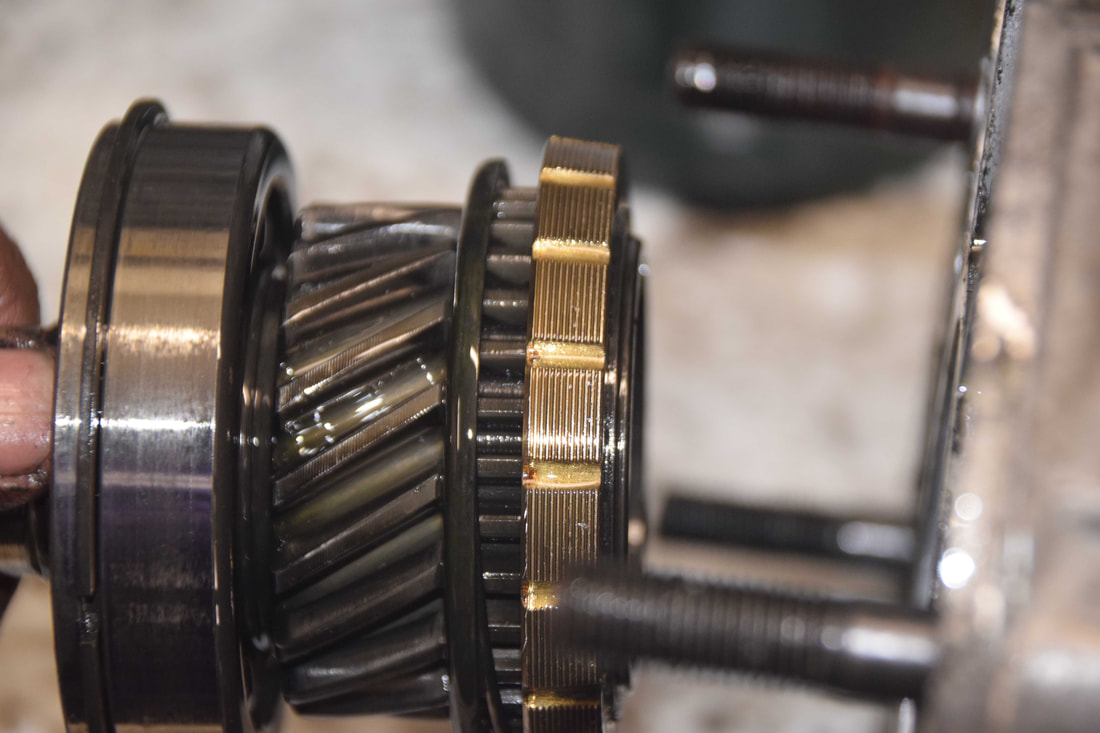
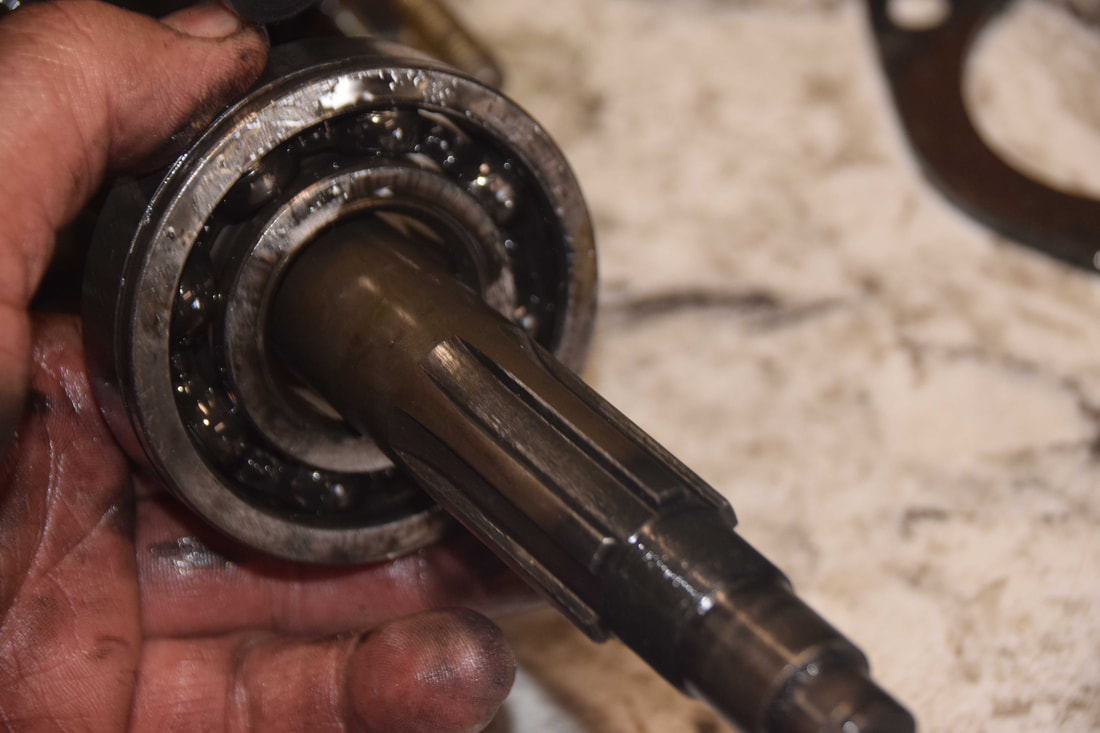
Remove the front 4th gear input shaft from the bell housing side of the transmission case. Be careful as the roller bearing in the back of the input shaft will likely fall out.
Input shaft being removed from the case. The brass synchro is clearly visible. The synchro sleeve will remain inside the transmission case.
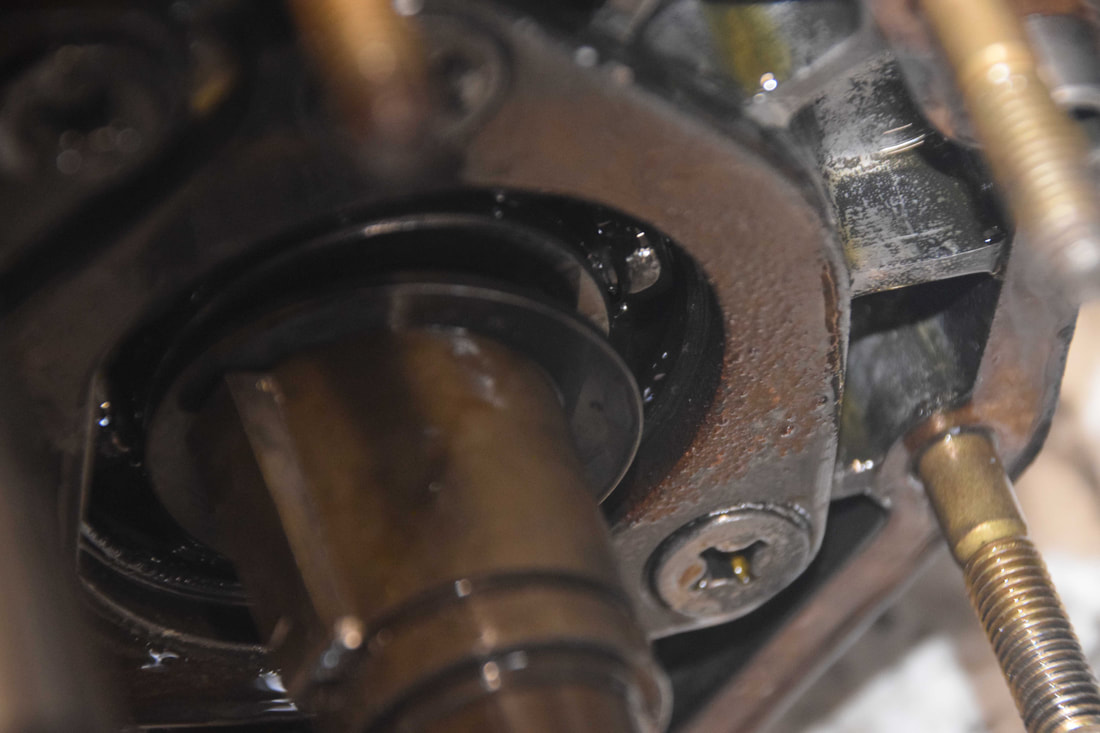
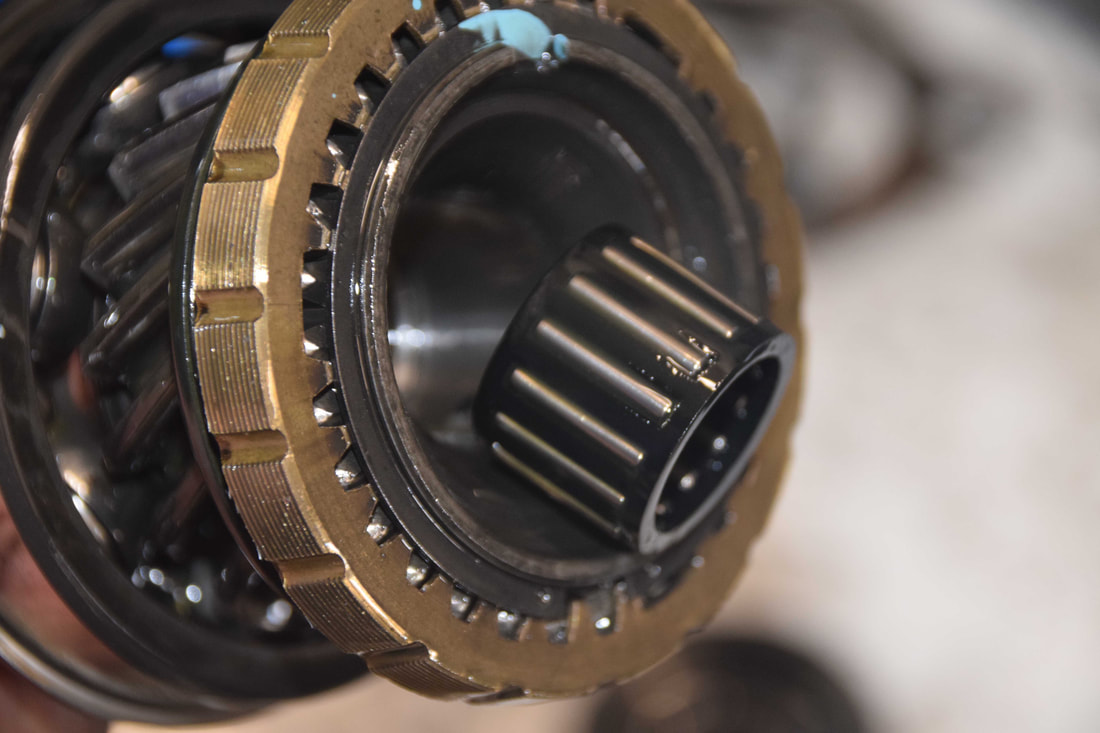
This is the roller bearing at the rear of the input shaft where it connects to the main shaft.
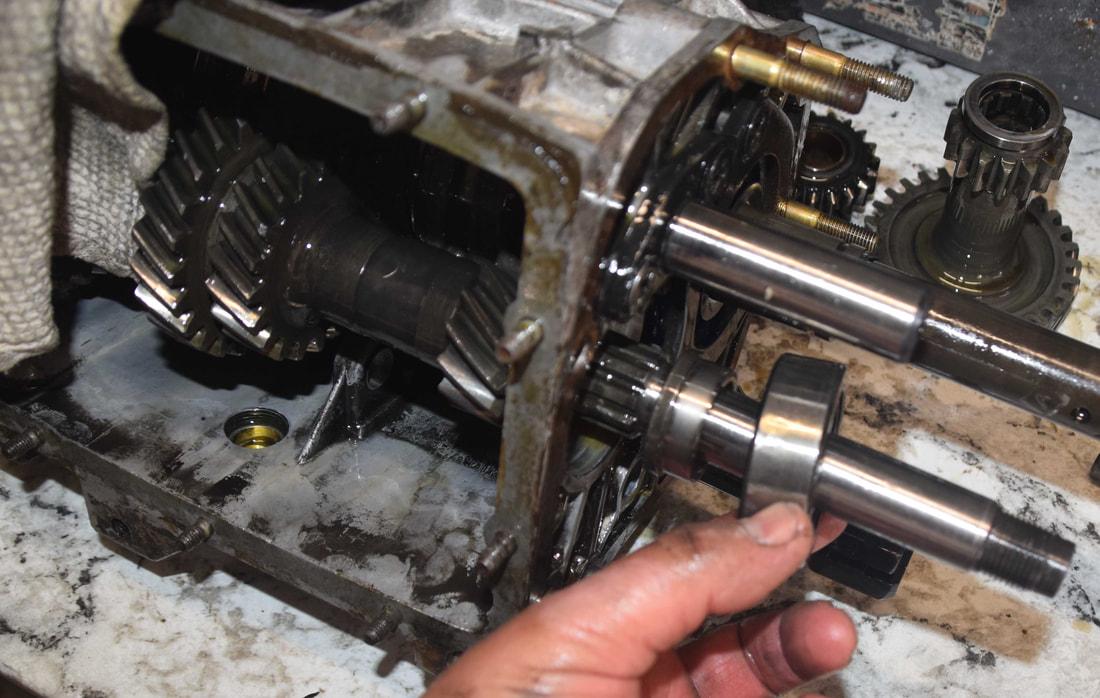
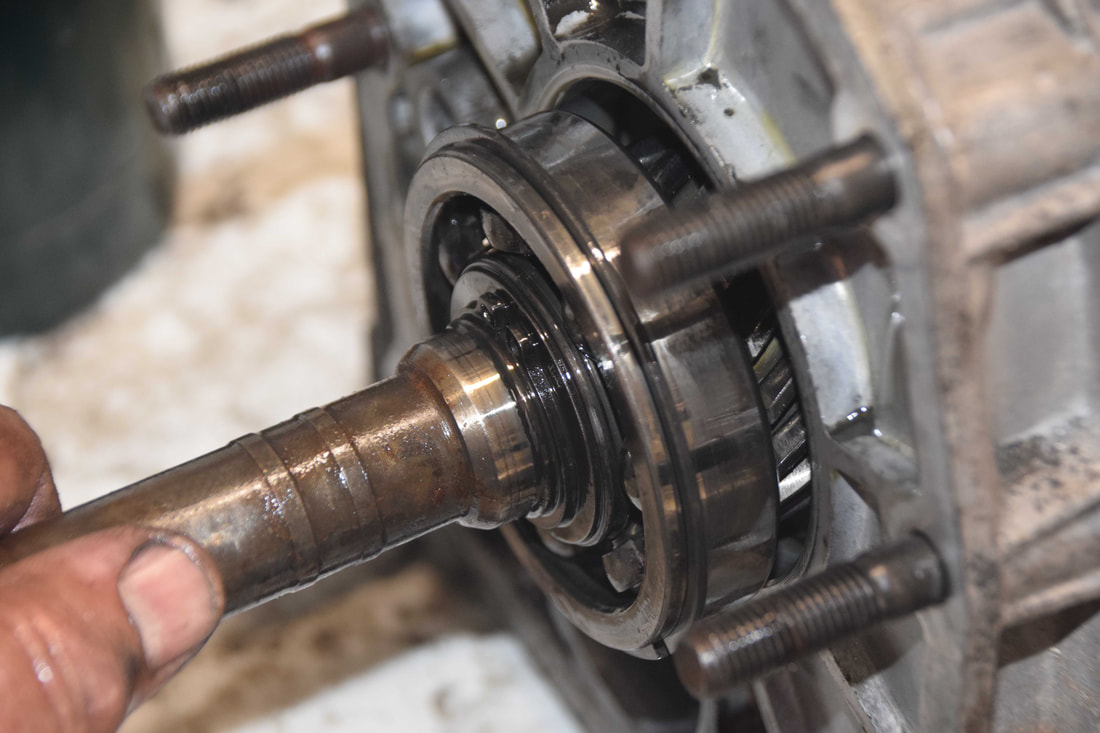
Remove the bearing from the main shaft. If you have not already done so, remove the spring washer first noting the orientation/direction of the washer for later installation.
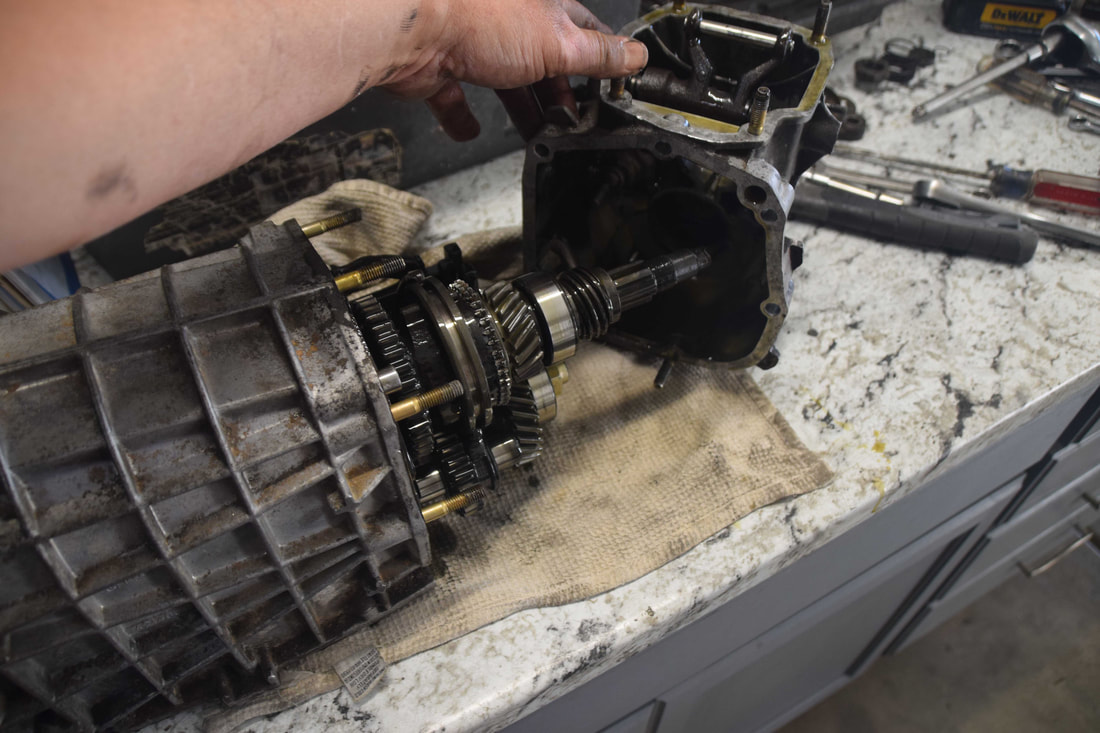
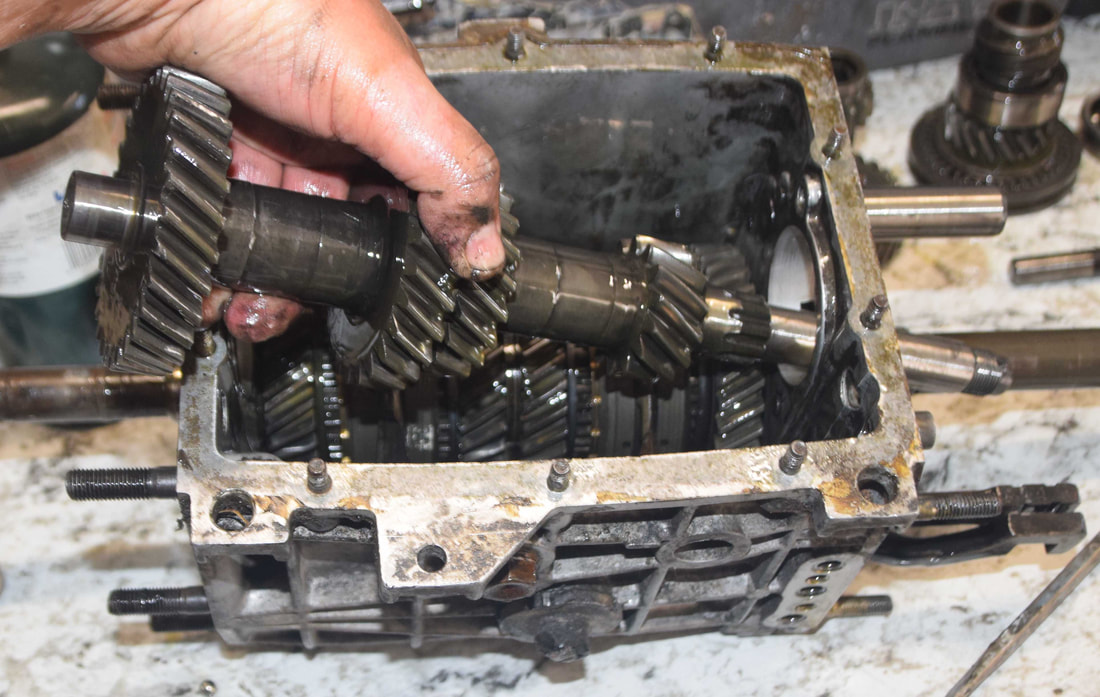
The main shaft assembly can now be removed from the case. Note: The rear synchros and sleeves will want to fall off the main shaft. Hold them on when removing the main shaft.
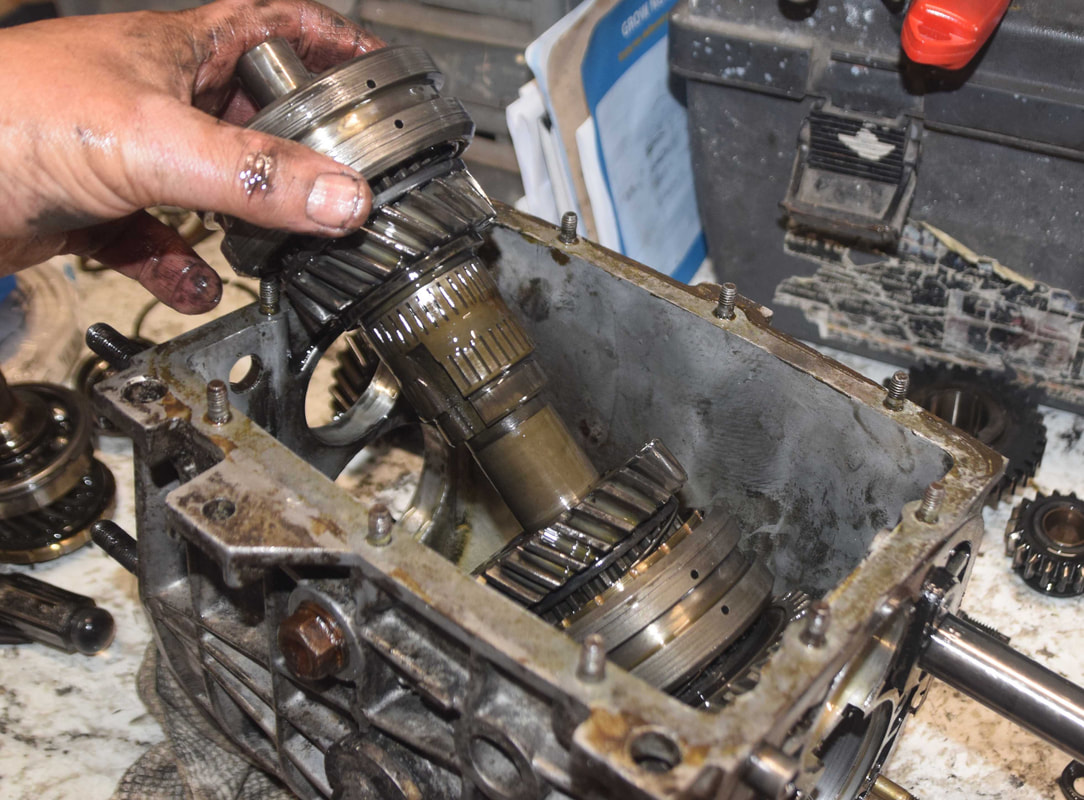
A big, empty transmission case. Time to tear down the mainshaft assembly!
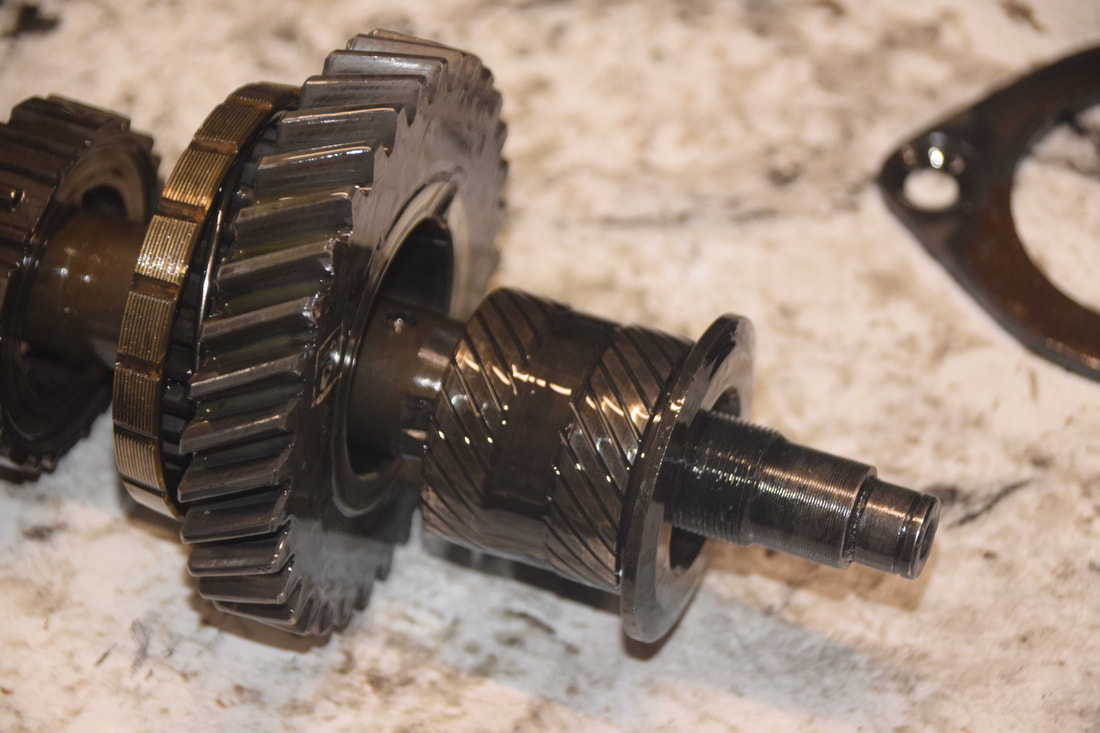
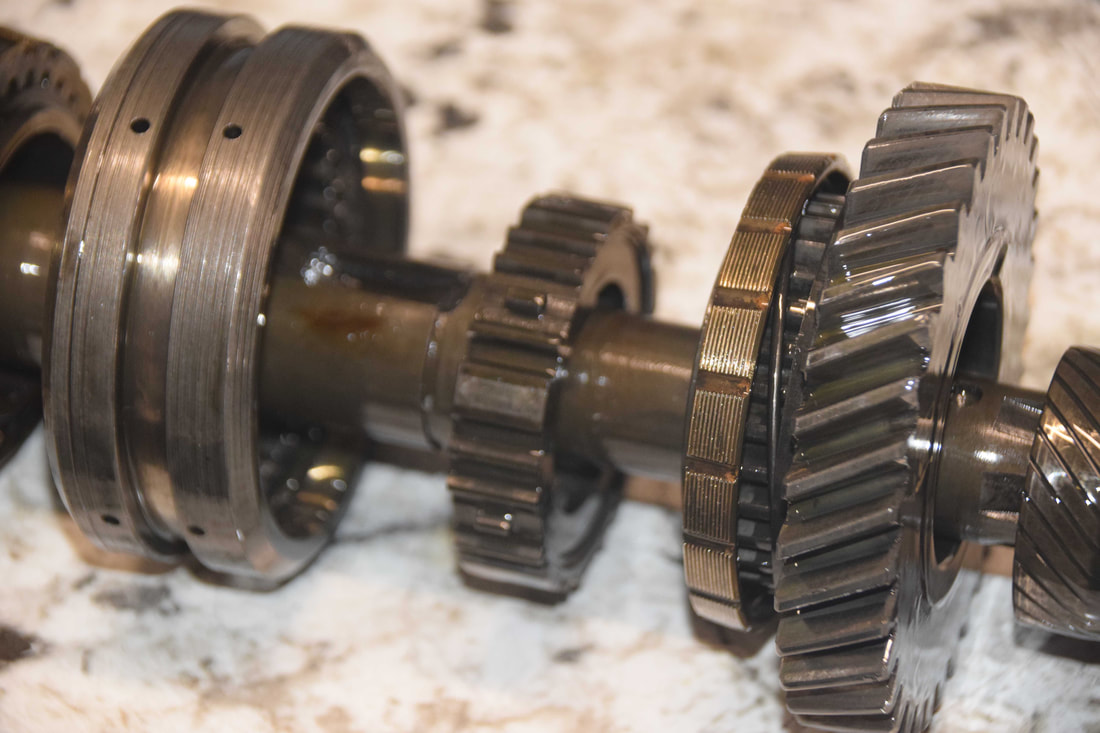
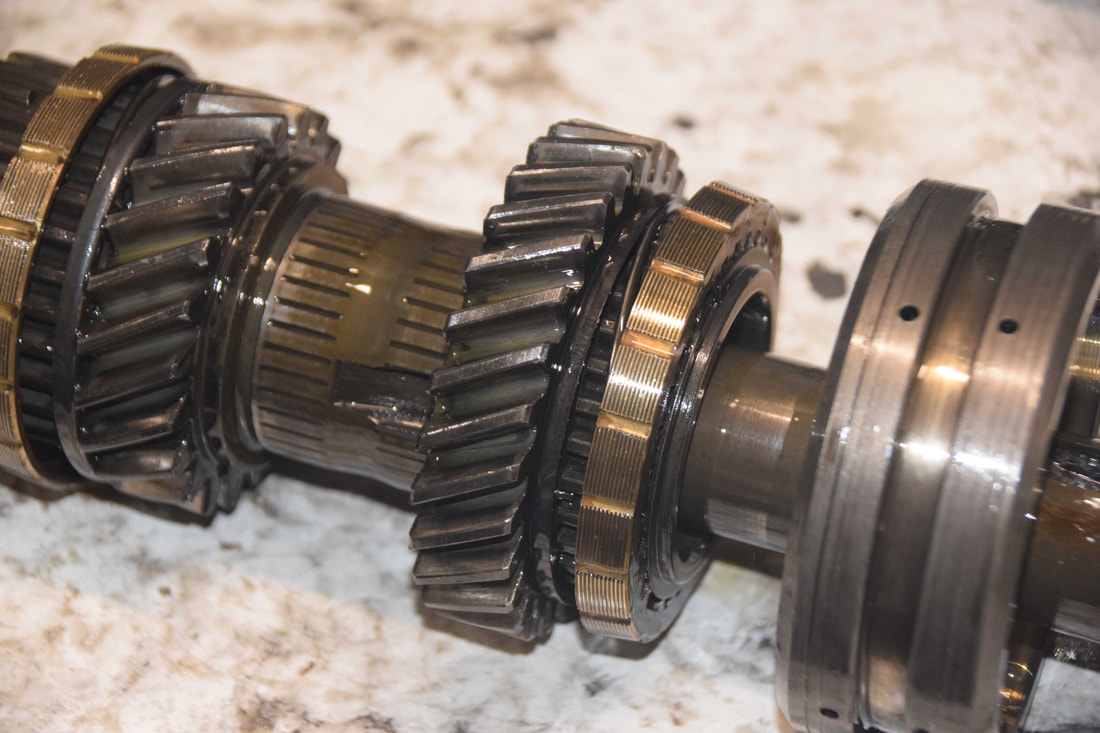
With the main shaft removed, there are only a few steps remaining to completely disassemble the transmission. Here is the main shaft assembly before it is torn down the rest of the way.
Remove the sleeve
Remove the 1st gear assembly, hub and synchro sleeve
Remove 2nd gear and synchro assembly
Remove 3rd/4th gear synchro sleeve
Remove the circlip from the main shaft (may require a press to compress the spring washer/thrust washer). Note the orientation of the spring washer for future assembly.
Remove the hub
Remove the 3rd gear synchro assembly
Synchro gear assemblies
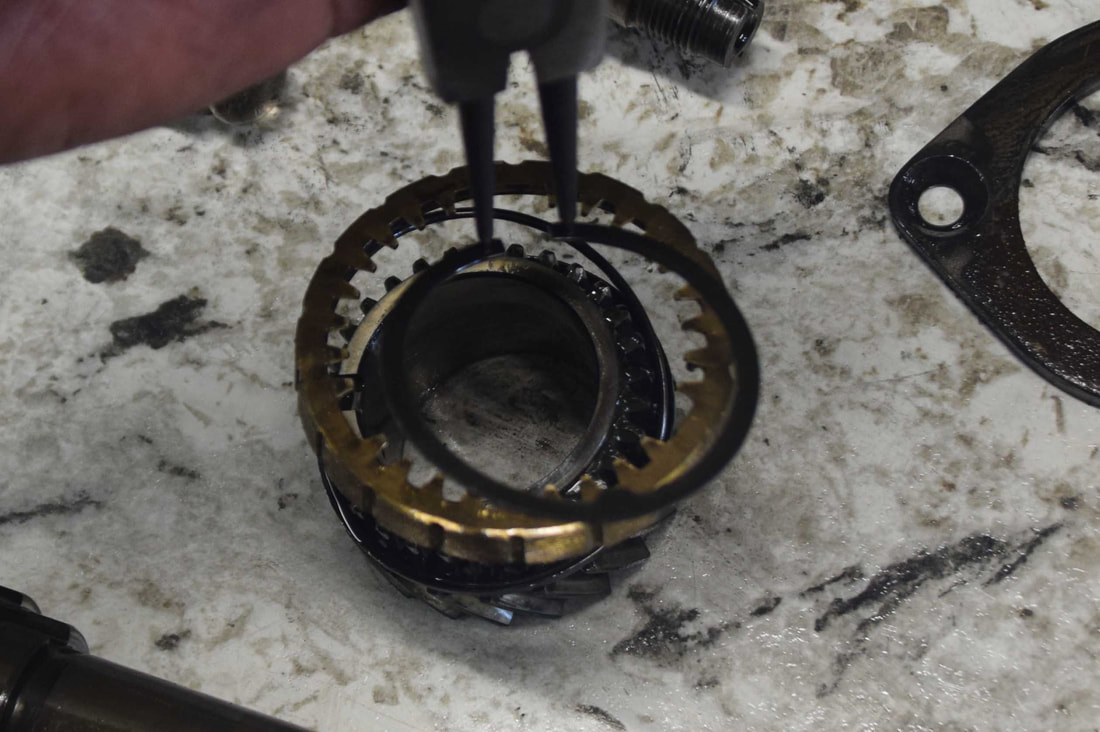
All of the syncho gear assemblies disassemble in the same manner. I am showing only one as an example. First, remove the circlip using circlip pliers.
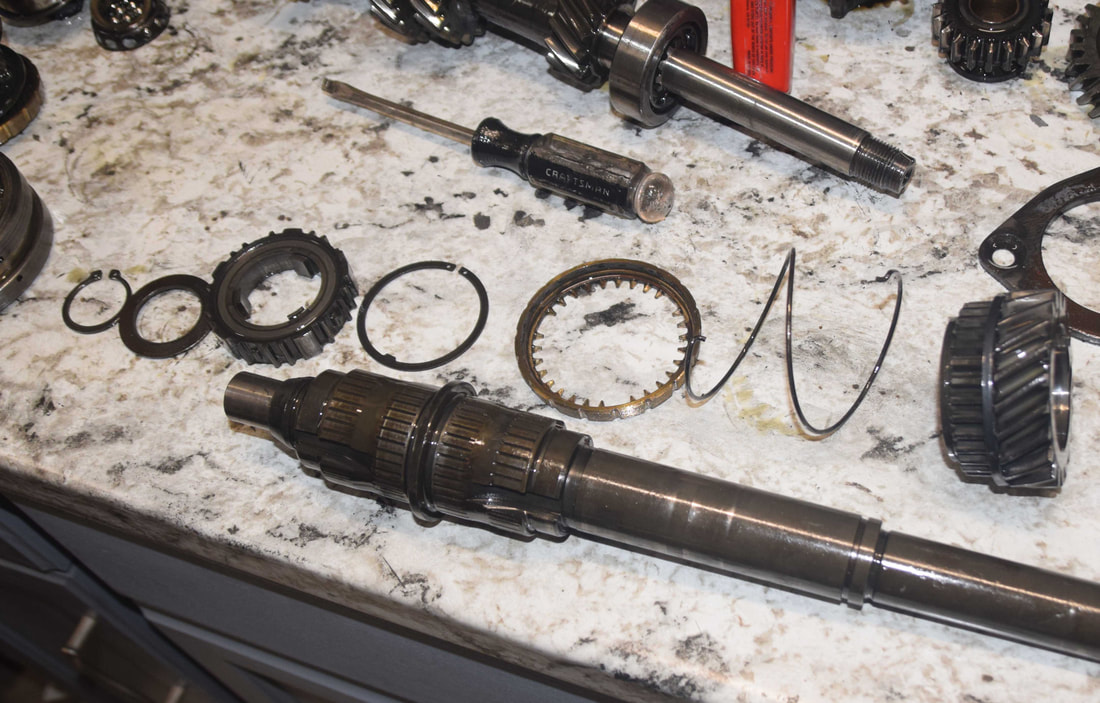
The transmission is disassembled!
Note the order of the synchro gear assemblies
At this point, it is time to clean all the parts and inspect for wear, burrs, scratching and galling.
My recommendation is to replace ALL synchros. They're around $20 each and you'll need four. Replace circlips as a precaution. Inspect all gears and synchro sleeves for damage. Replace as needed.
The most common problems with the transmissions is as follows:
1. Worn synchros from age. The ridges should be sharp to the touch and not worn flat at the tips.
2. Worn shift forks from age, but usually the 3rd/4th gear shift fork is severely worn from driver's resting their hands on the shift lever when driving. Shiny grooves will be evident on the sides of the shift fork tips.
3. 4th gear/input shaft teeth torn up from grinding gears due to bad synchros
4. Worn front input shaft/main shaft roller bearing (will wobble when the input shaft is moved up and down in the case)
5. Worn rear input shaft roller bearing (will wobble when the input shaft is moved up and down in the case)
6. Worn synchro sleeves from long-term wear
